A quick tatting catch up

red snowflakeHello! It’s been ages since I last posted, but not for the lack of activity, mostly for the lack of light to take photos with. I’m supposed to be working on a presentation right now, so of course seeing a little bit of sunshine pop out makes this an excellent procrastination moment.

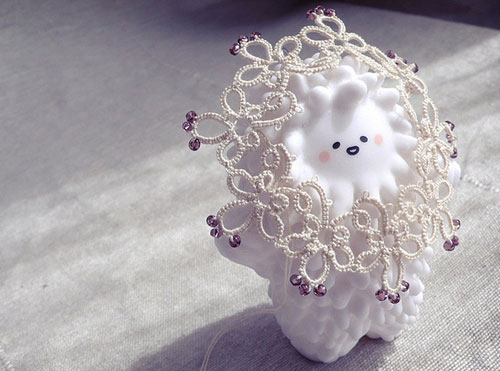
Above is my first snowflake of the year, using up that slightly odd variegated thread. This is one of Jon’s patterns, from her snowflake book – apologies, I can’t seem to find a direct link to it on her site, but her patterns are all well written and beautifully put together. You’ll see that now I’ve got a bit more experience with beads they’re on everything!

port isaac

In the time since I last posted, I did manage to have a few days away. We went to Port Isaac in Cornall, which was lovely. Above was the view from our bedroom window. Fans of British TV might find it familiar; the building on the left is the school in Doc Martin, and loads of the show is filmed around here.  That said, we appreciated it more for its general loveliness as a village than a TV set, having never seen the show…

I’ve been working on a few different things – a quilt, which I’ll talk about in another post, a knitted baby blanket (beyond frustrating, and it’s not even a difficult pattern), and some more tatted motifs.

pink
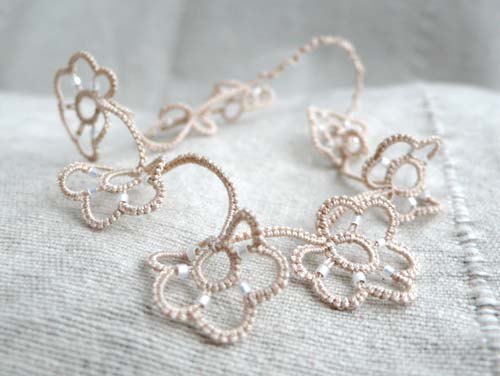
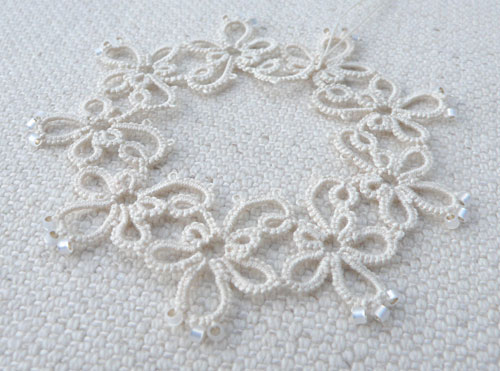
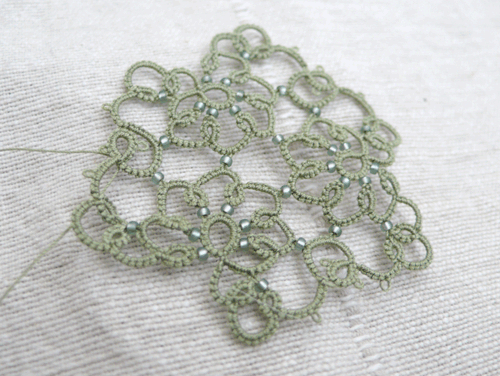
This is the correct version of the motif in the previous post. I stitched on the beads here, rather than add them to the tatting as I went along…

green
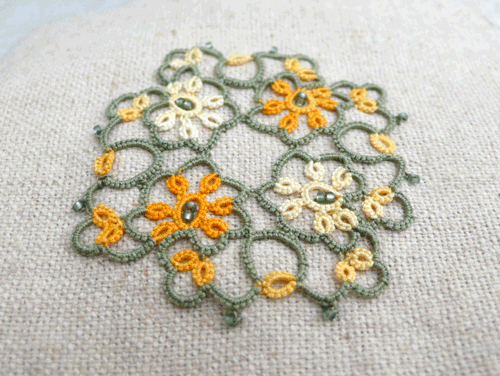
It’s amazing how different the same motif looks in different colours, I think. The dark outline isn’t ideal – I think it relies on very strict blocking to make it work (something I haven’t done!)

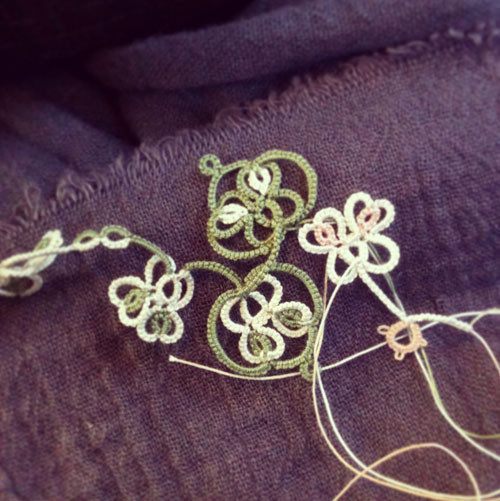
This version below is tatted with beads – can I get a good photo of it? Nope. But the red beads really glow in real life – you’ll have to trust me on that:

black

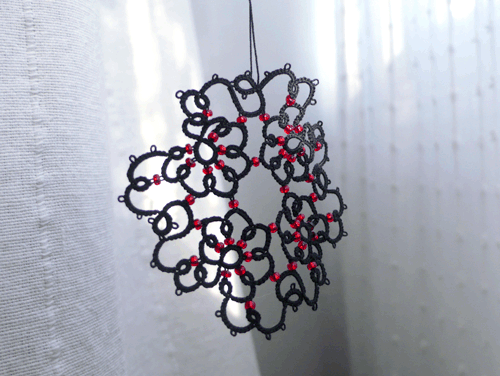
I wrote down the pattern as I made this, and then realised of course, I’d made two versions on the pattern. This one is not the same as the ones above. Not sure which I prefer really, and so I’m not really ready to share the pattern yet. Thank you for the offers of help with this though, very kind.

tri
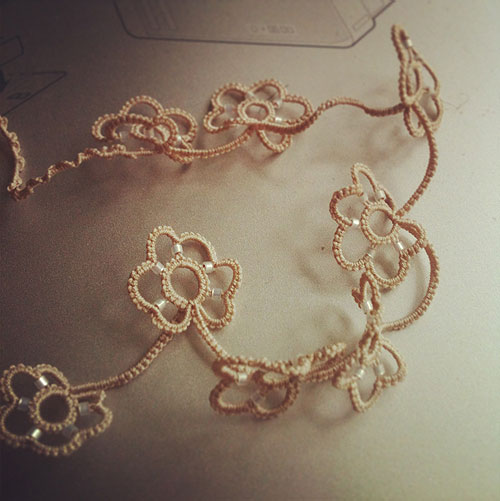
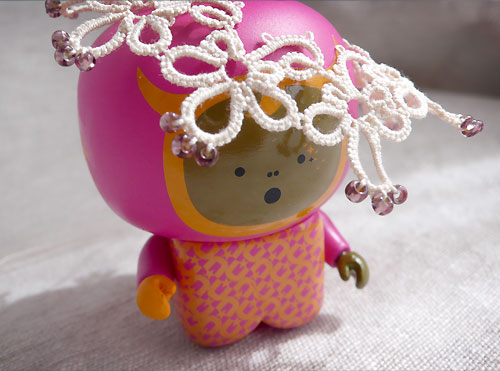
This version just has three repeats of the main motif. I’d like to say it was on purpose – it wasn’t, but it was an interesting exercise! I love these beads with this thread, incidentally. They were bought separately but go so well together. I bought them in a random craft shop, but they’re made by Mill Hill, and are ‘seed petite beads‘. They’re pretty small, but amazingly I can still get that tiny crochet hook through most of them.

This is the three motifs together. I love how ‘goth’ the black one is.

three motifs
These are all tatted in size 80 thread. I tried holding the black one up as a pendent to see what it would look like – and it’s huge! Seeing as most tatted jewellery tends to be in much thicker thread, its made me wonder if all tatted jewellery is gigantic?

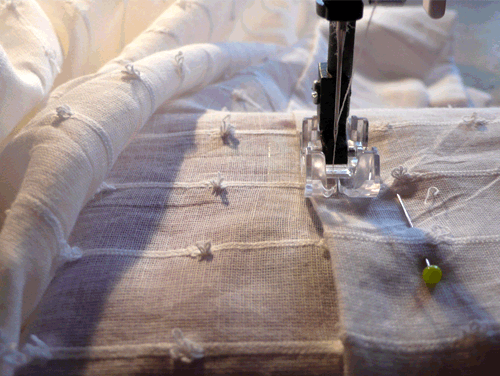
In other news, I also managed to shorten some curtains on my tiny sewing machine (it’s a bit like this). I’d been putting it off forever, but actually it was no where near as bad as I thought it would be. No major incidents, everyone still has their limbs and digits attached.

curtainsHope everything’s good with you guys. Next time: the quilt. (I hope).


Hooked on beads

Lavender bag pink

After tatting a million versions of my own pattern, I sat down to make this a few weeks ago, missed off  a ring and ended up with a more open wreath shape than I was expecting. I stuck with it though, and I think it’s fine (not perfect, but fine). I added the beads to this as I stitched it, which in some instances, I think I prefer…

White lavender bagThis is my own pattern tatted correctly this time – you can see how much tighter it is, and again I added the beads as I stitched it. This is tatted in size 80.

mini cushionBoth of these are made with envelope backs, and both have a little strip of fabric across the opening, which I quite like. I think I like this method for lavender bags actually, but it does take a bit more time – and you have to make a little cushion of the lavender to go inside. I was really tired when I sewed these together though and managed to completely confuse myself. I made such a nice neat hem for the inside piece (the one under the coloured one), so tiny – and then stitched it on back to front so the hem is inside and the rough edge faces outside! You win some you lose some.

bagsI think they look fine though.  I worked on the pattern so much there’s actually another two to come in different colours! I just need to stitch them first.

flowers

I’d always thought that certain methods of using beads wouldn’t be possible as I like to use size 80 thread, and the beads that work best with it are tiny. Certain methods — like you can see in the picture here — require you to pull a loop of thread up through a seed bead, with a hook. How on earth do you find a hook small enough to go through a seed beed? The answer? By accident.

hook(Excuse my gluey finger – I’d previously been doing some DIY). I bought this hook from Jane Eborall. To be honest, when I bought it I don’t think I’d really grasped *quite* how small it was. If you try and look at it when it’s in your hand — really look at it — you go cross eyed! It’s absolutely weeny. It’s so tiny that when it arrived I wasn’t that  sure I’d use it, which is a massive shame, as I really like it. As a day to day hook it can split the thread, but I was thinking about beads recently and suddenly it hit me! I HAVE A HOOK THAT MIGHT WORK! And lo and behold, it is *perfect*. So, thank you Jane – thank you for emailing me when they arrived in your shop, and thank you for knowing what I needed better than I did!

Now I just need to work on some patterns with beads – but I feel like a whole new world has opened up! There is of course a downside — tiny tiny beads don’t mix that well with bumpy train rides, which is where I tat the most. But I’ll work on that.

Have a great weekend!


Instatatting

Train Sketch

Well – as you can probably see, that is not a photo of a quilt in progress –  nor a small crochet bear. It *is* an instagram snap of some tatting, taken on the train. I was sketching a new design, but I’m not sure it’s working. The green and white bit to the left of centre reminds me of snowdrops so that would be the best way to take it perhaps. We’ll see.

I’ve been working on a new quilt today, and so when the light was best for photographs, I was busy at the machine. Now I feel like telling you more about the quilt and the small crochet bear I’ve also made but it’s too dark for photos with my grumpy camera! Apologies.

bracelet

Again another Instagram shot. I made this yesterday from a Japanese pattern. I added the beads just to test something out – which worked. I’ve got a longer post to come about beads, but it needs more photos to explain, so… next time.

In other news, I ran my second 10k, and it was fine! I didn’t want to drop dead at the end of it, and I’m probably doing another one in November. It’s also the Knitting and Stitching Show next weekend, and I’m going with a friend, and looking forward to it immensely.

See you soon, I hope, with better photos 🙂


Not everyone loves tatting…

Treeson
It looks like someone has been playing around with my tatting. He does look rather happy about it though, basking in the sunshine. This little fella is called Treeson. He’s been sitting on the shelf for ages and begged to be included in the photos at the last minute. What I think he really wanted was to be dusted. Ahem.

Moving swiftly on, this little lady is clearly horrified with the very idea of tatting. Either that or she just hadn’t realised beads were a *thing*.

unimpressed

But a *thing* they are. I think the ones she finds so horrific are my favourites actually. They look really glassy – they’re really pretty. I like them with the ecru thread too, even if they are a tad large.

glassy

When I bought those it was on a whim — I was actually looking for tiny pearls (well, fake pearls). I was at the Creative stitches and Hobbycrafts show at ExCel. It was packed though, and I couldn’t really find what I was after. I bought these, which I’m in two minds about:

white

They’re a bit hard to photograph. I like the subtlety but these are clearly tiny pieces of tube, so they’re not rounded at the edges, if that makes sense – and I think they’d be nicer if they were. I think this will actually look nice sewn on to linen (was just going to make a bunch more lavender bags or something). It’ll be subtle, but pretty  – not quite as girly/pretty if you see what I mean. A bit more understated. We shall see.

Here’s a not very pretty shot of some green Japanese beads…

green

Same pattern – I used these beads on a bag I made for my mum – and they’re actually tiny (the thread is size 80, so quite thin – close up photos are a bit misleading). For the bag, they’re actually sewn on, rather than tatted in. You can just about see here though, how nice they are compared to the white ones – they’re rounded at the edges. I think on the whole, they’re too subtle on the green thread – too good a match actually, for things bought independently. Lovely beads though. Might try them tatted in to the ecru. (Apologies, I have no idea where on earth I got them from.)

So yes. Been a busy few weeks tatting on the train, which I’ve really enjoyed. There’s something great about having a pattern committed to memory so you can relax your brain to and from work – while being productive at the same time. I’m a strong advocate of repetitive craft as meditation, I think. Keeps the stressy part of your brain busy, and leaves the other part free to concentrate on the bigger things.

Now, if i could just get this one to calm down…

stay calm

Have a good weekend – and if you’re in the UK, a good bank holiday!

Tatting—no monkeys!

tatting with beads

So, yes. After having itchy fingers but no opportunity to tat for weeks, I finally managed to wrangle some time over the last few days. It’s been lovely actually, I really do enjoy it. As you may or may not know, I usually tat in the train, and recently there’s always been something stopping me. No seat, person’s elbow in my face, hands too cold, too rushed, need to do reading for work, always *something*. On Thursday I had a two hour train journey to visit another city for work, and on Friday the return journey home. I was a little nervous about the trip, but I’d prepared everything I could and so decided it would be good to tat on the train. Best of all options; relaxing and productive.

no_beads

I bought another Japanese Tatting book a while ago, and decided it would be a good chance to try this pattern out. I thought I’d add beads as I bought some the other week which were a good match for this thread, so I packed the beads and a needle with my usual kit, congratulated myself for my forward planning and off I went. Obviously the needle was too thick for the beads, and so what you see directly above is attempt number 1, sans beads. Doh!

beads


On the way back I had a seat to myself, and room to spread out. The train was moving quite slowly to I managed to thread the beads on — after some thought I kept them on the ball thread, rather than the shuttle thread. Another rookie error! What I *wanted* was the beads going through the picots on the outer rings (the groups of three little sticky-outy loops)… not really on the chains, as you see here. Sooooo, at least I now know:

• beads on ball thread if you want beads on the picots of your chains (as seen above)

flush
• beads on shuttle if you want the beads *flush* to the chain (as seen above). This is how I’ve always done it in the past, more by accident than design. This is just a little test piece.

picot
• beads stored on shuttle and moved around to the back of the ring thread until you need them if you want beads in picots on a ring.

Phew! A good lesson though. Always good to learn by doing. Couple of other things – that pink doesn’t go with anything! It’s hard to photograph – looks awful on linen or ecru, weird on colours, harsh on white. The beads go nicely with it though! I also think that while the pink can handle the beads that size, they look a bit big on the ecru/natural thread above. Both threads are size 80, but maybe it’s the colour that makes it seem bigger on the natural. That said, I do think the beads are really pretty.

It does make me laugh sometimes, making things like this. I looked at the curtains earlier as they were tied back to let the fresh air in. I thought ‘you could tat an edging for the tie backs, seeing as you keep wanting to make an edging pattern’. Then I thought ‘Are you nuts? You hate flowery stuff!’

Love making it though 🙂

Hope you had a great weekend.

Tatted train-doodles make it home

blue

It’s amazing what a difference a camera can make. Mr Occasional Crafter took the above photo on his camera, as for some reason mine just wasn’t really cutting it. It’s far too blue, but I decided not to correct it, because I love it! It makes my tatting look amazing, I think.

Back to harsh reality now, and the photos I took. Sorry!

pins

I’ve continued to ‘doodle’ with my tatting recently, which I’ve rather enjoyed. While one part of me worries that I’m not tatting with a purpose, the other part is quite enjoying wingin’ it. I’ve been tatting daisy chains again – or rather daisies, and then joining some as I go to create more solid shapes. The plus side of this is that it really shows how useful split rings are – without them I’d’ve needed to cut and tie a few times, the minus side is that I could really do with actually planning it a bit to make a more fluid or useful shape.

I’ve been using a lovely silver grey DMC thread (size 80), which tats up beautifully. It seems to have really good stitch definition for some reason – almost more than other colours – and I’ve loved using it. This weekend I decided I’d stitch it onto… *something* and then decide what to do with it. For once, I decided against linen – maybe the tones were too similar, I’m not sure, but it really didn’t look that good. I almost went with black, but at the last minute switched to grey. That old grey sheet I saved from the charity shop is really earning its keep!

I pinned it out before stitching it, as you can see. Then I unpinned it as I stitched and completely changed the arrangement bit by bit. It seems appropriate. Tatted as a doodle and stitched as one too.

Layout

Sorry – the photos really are all over the place in terms of colour, but at least you can see the layout here – and the beads. I sewed the lighter beads on first (they’re actually a silvery grey), and then at the last minute, after realising I had some, I sewed the black beads on for some contrast. I wasn’t sure about them initially, but actually I think they work quite well.

close up

I’m not sure yet what I’ll do with it… maybe a panel for another drawstring bag? It’s a bit big for a lavender bag. Actually, maybe I could use it as a panel on a fabric basket? I’ll have a think. All suggestions gratefully received!

Either way, I really enjoyed making it. Also, it does look rather nice. So nice in fact, I’m quite surprised I actually made it. (I’m not showing you the back though).

In the pink

tatting

I’ve had a very nice afternoon, but by the time you read this, it will’ve been a week ago. I’ve been making a present for my mum, and I know she reads my blog sometimes, and so I wont post this until the gift is given!

bag

This is not quite what I was intending to make – I was going to use the daisy chain to decorate this, but it wasn’t working that well. After some consideration I decided to decorate the bag with a different piece of tatting, and add some beads which would co-ordinate with the top section of fabric.

tatting and beads

I love the beads and the fabric actually – they’re a nice muted sage green. I sewed the beads on as I stitched the tatting to the fabric, which worked quite well. Biggest problem was finding a needle small enough to go through the beads – I keep buying needles and can only assume that the Borrowers get to them before I do, as I can never find them!

I really like the piece of tatting on here – I was unsure about it before, but I think it looks perfect on a bag like this, embellished with beads. (I’m tempted to make another one now! It was from this pattern, and looks rather different here.)

pink

And there’s the pink! I used a pink lining for the inside, which just peeps out at the top. I’m really pleased with it, as I think it just adds something a wee bit extra – I love how muted the rest of it is, with pink to add some contrast.

I had to hand stitch around the top as the bag was too small for machine sewing. It’s not perfect, but I did my best. I hope she likes it.