Crochet, tatting, knitting, patchwork, secrets and lies

Little man

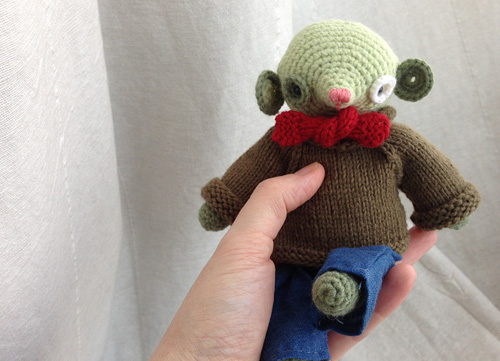
You know some weeks, nothing seems to work? I got so frustrated finishing this chap on Friday that I threw him in the bin. My boyfriend spotted him in there yesterday and took him out – then gave me a telling off for being mean.

He’s supposed to be a little mismatched, his ears and eyes are different, but really, his jumper was actually supposed to fit. I had to unpick half of the jumper when I realised I’d mis-counted due to a phone call. Then I realised that even after re-making, the dimensions were never going to work. The nice cuffs were going to be hidden as the sleeves need rolling up, and don’t even talk about the neck… (I’m so pleased I guessed it all correctly for the giraffe – looking back it’s a miracle!)

lil_chap2

In the end I stitched him into the jumper at the back, so it kind of fits, but it’s not ideal. I also made him some trousers – it’s not that easy making trousers, is it?! I just guessed the shape; imagine two pieces of fabric shaped a bit like an upside-down ‘V’. I ended up cutting them in half and re-sewing down the centre to get the right shape – but I think I might understand a little more about trouser construction than I did before!

lil_chap3

Actually after all that I really like him. In real life he looks like quite a gentle, bookish soul. It’s really the jumper that does it. Now I can actually knit I think every crocheted toy needs a jumper. Due to the slightly delicate clothing construction he’s definitely not for playing with, so I think he’ll live with me. I have a feeling he’ll be happy on a bookshelf though – I just need to be nice and apologise for throwing him away. (!)

Patchwork

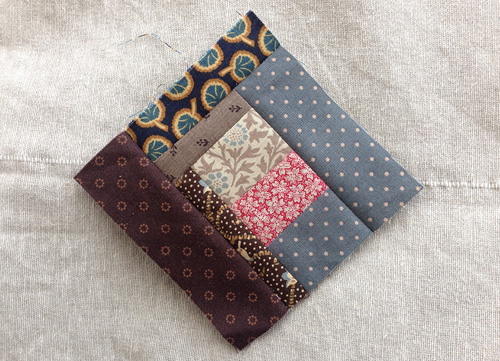
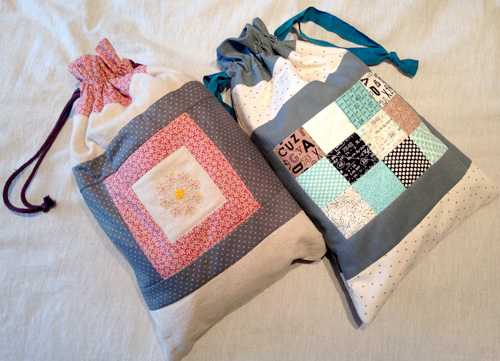
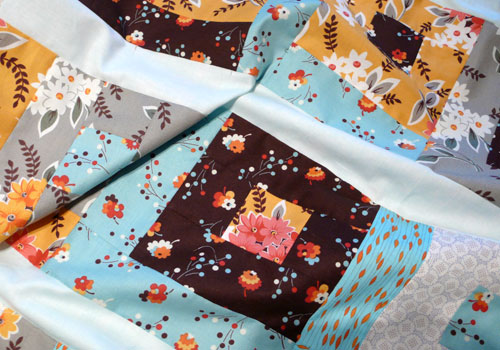
Before I started fixing him yesterday, I got the sewing machine out and had a bit of a play. I’d already decided what I wanted to make, but I fancied playing with a few scraps first. These were all small pieces from my scrap bag, but I think they go nicely together. Not sure what I’ll do with it yet.

needlecase

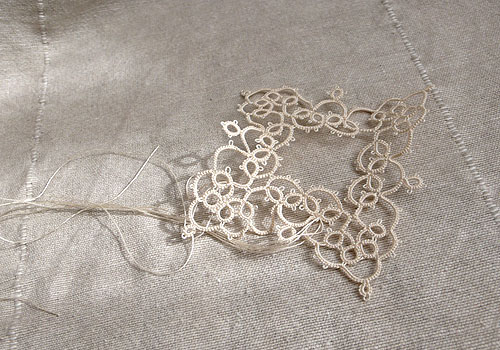
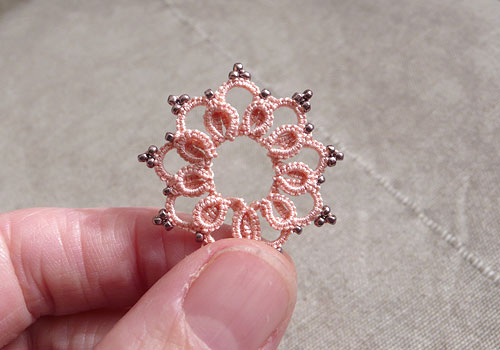
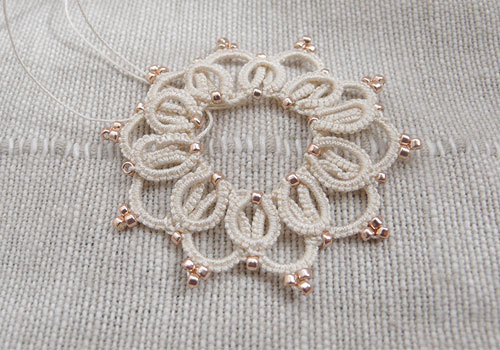
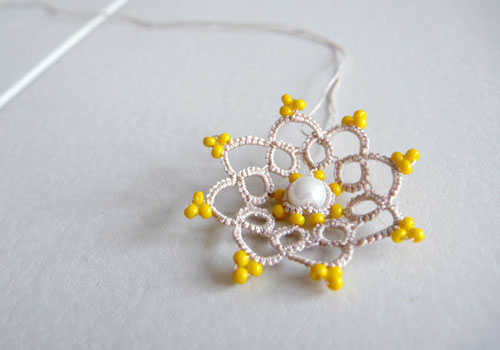
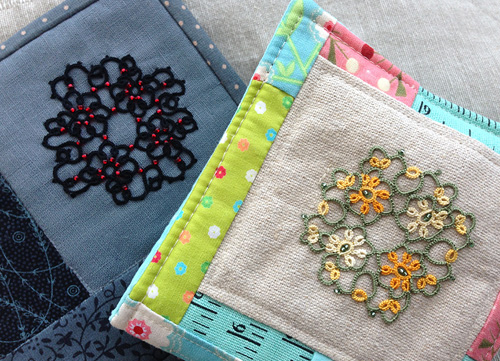
This is not the most inspiring photo, but I decided to make a needlecase, loosely based on this tutorial. The tatting has been knocking around for ages… Eeek, since 2013 in fact! I thought it might be nice making something a bit less girly for a change.

inside

This is what it’s like inside – a little pocket front and back, perfect for the essentials (like a rabbit). Don’t look too closely at the binding. Ahem.

inside2

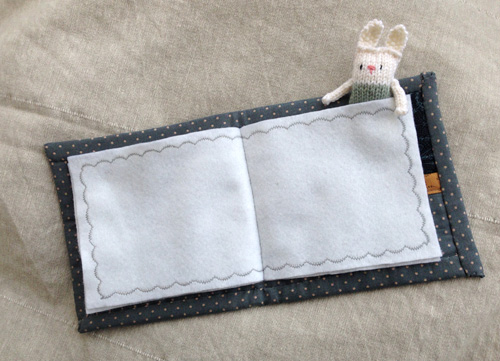
Just like the previous one, this is all made of scraps – which includes the dreadful, cheap, synthetic felt. So just like the previous one I stitched around the edge of the pages, but this time with darker thread on one side. (Yes, that rabbit is hiding a mismatched corner… thanks for asking).

prev

I love how different the new case feels when compared to the old one. And talking of the old one… I use it all the time.

You know what I’ve noticed? Everyone who makes a needle case and then photographs it does what I did up there ^. They show a perfect selection of pins or needles, perfectly aligned. Who keeps a needle case like that?! No one, surely? Certainly no one that ever uses their needles.

reality


This is what the old needlecase looks like now. Its all bent out of shape and a mess.

But I love it.


Bags of joy (or craft as therapy)

bag_1

It’s been a weird month or so. My partner has been travelling a lot and for a boring health reasons (herniated disc) I’ve been stuck at home. Like many people who work in London and live in a town outside I don’t really know anyone locally. The last few weekends have stretched out endlessly – but in a bad way. When you’re feeling super-cheerful, a free weekend feels like a brilliant opportunity. When you’re a bit fed up, it feels like it will never end. Social media doesn’t always help – perfectly posed photos of friends having amazing times, going places and doing things, and there you are home alone, climbing the walls (or you *would* climb a wall, if you were able to stand up).

There’s a lot been written and researched into the therapeutic effects of knitting and/or making things; here’s one article. Google and you’ll find loads more. I have to say I agree completely. I find that tatting and knitting both require counting, which calms a busy brain, and that sewing is good because often the projects are started and finished in a day and you really feel like you’ve achieved something.

There is no physical position I can get in that is pain free at the moment (can’t sit on the sofa, can’t lie down) – BUT on the upside, the closest I can get is a hard chair at the kitchen table, as long as it’s not for too long.

I decided this was the perfect weekend to make the most of a few things aligning: free time, no interruptions, a free kitchen table. What did I plan on making? Another zip top bag. What did I make? A drawstring bag!

bag_2

I’m really pleased with it, even if I do say so myself. I bought this the Elementary Mini Charm Pack from Moda just before Christmas. I’d sort of said that I would make my partner a quilt, but the one I have planned needs some black fabric. I bought the charm pack as a tester to see what would and wouldn’t work. I must admit, it’s a really nice pack. You get 42 squares in total – which when they’re all laid out, is quite a lot.

The zipped pouch I was going to make would only take 4 of these squares and when I put them together, it seemed like a shame. It felt like it would be nicer to put a few more together and make something bigger.

bag_3

I made this drawstring bag in 2013, and I use it all the time. It’s quite big, and of all the things I’ve made, it’s the thing I enjoy using the most. (Although I think that could be because most of the things I make aren’t that useful!) It’s tatted and embroidered – which despite being a bit flowery for my tastes I really like – and thinking about it, I wonder why I’ve never repeated? Anyway. I decided to make another bag roughly the same size.

bag_4

(Sorry for rubbish iPhone photos – the blank patchwork square actually has a pattern on it!). I didn’t measure anything – I just started with the charm squares and went from there. I ALMOST had a wobble when the charm squares were put together and the grey border added… would make a really nice quilt, but I decided I wanted to finish something there and then and actually, I have a use for the bag already. The white fabric with tiny blue stars was a speculative purchase ages ago, the grey fabric was in my stash and I managed to cobble just about enough calico together to line the inside. The ribbon handles I found in the back of a drawer – I was really pleased as they’re not a bad colour. I think they’re the handles from a posh carrier bag. (Always save those ribbons and cords, they’re usually just the right size for *something*).

bag_5

In terms of construction, I used this tutorial again, I quilted the main section after the patchwork was complete and before I started putting the panels together. By which I mean I stitched through the front straight on to the batting, with nothing behind it. The top grey section has iron-on interfacing to make it stronger, as it’s the bit that gets the most stress. Inside it’s just basic calico, which is heavy duty enough, and cheap, of course. I actually didn’t do a *terrible* job of that top stitching on the outside – but yes, I was too lazy to hunt for a more discreet thread colour.

And thus, mission completed. Just the right project – took long enough, but not too long. Required the right amount of sitting, but enough to keep that spine moving, as you need to get up and iron things, or chop things up. It also needs a bit of thought, but not enough to make you worry about it.

If you need  a project to cheer yourself up, and you like sewing, I would recommend it. (If you like knitting, I would recommend a hedgehog.) I’m hoping though, that if you are sewing things, you’re happy both before *and* after you start!

Here’s to it, us and making things.


Seasonal tidings

hedgehog

Hello! This is just a quick post to wish you a happy new year while I get a chance. Thank you to everyone who’s stopped by this past year and shared a thought or a quick comment, it’s been much appreciated.

I had a hectic few weeks in the run up to Christmas, but a large amount of work-travel meant a lot of waiting for planes, trains and automobiles (or that kind of thing) and so I did manage to tat a few snowflakes for people. I did not, however, manage to take a snap of them before I sent them off. This year they’ve been very well received though, which is really nice.

Just before Christmas I managed to make the little chap you can see hiding in the lemons up there ^. I absolutely love him! He’s not the neatest hedgehog ever made, but heavens, what a CUTE pattern. It’s by Little Cotton Rabbits, and you can find it on Ravelry, or Etsy. He’s quite quick to make, and his nose is just lovely. He was a gift for my mum, and I think she liked him, so I’m glad he’s gone to a good home. I also made a strawberry (from this pattern) for a friend, to bring a little bit of summer back to the dark winter months. I found out that I’d actually made the others one row short every time! It’s amazing what you spot when you’re concentrating on someone else’s behalf.

starToday I learnt how to make these. My mum happened to have the strips of paper, and we figured it out from memory (hers), You tube, brute force (mine), and sheer determination. Sheesh, they’re not easy when you start! I’ve made another four this evening to decorate gifts yet to be given. I think I might actually need to make them once a month or something, so I don’t forget. I’m not sure I could cope with learning all over again. There is something quite magical about origami though. Tuck, fold, fold, tuck, fold, fold…. ping! An origami star. (Not counting the swearing, if course).

Anyway. That’s all for now. I hope you’re enjoying the holidays – here’s to a happy, healthy and productive new year.

Patchwork and tatting to beat the rain

quilt_3Hello! It’s a wet and windy weekend in the UK, and due to my other half being away for work I’ve had time to get on and make an eye-wateringly cheerful quilt top, in record time. Not only that, but it’s much less wonky (so far) than my previous quilting efforts. I bought this fabric at the Knit and Stitch show in Ally Pally (London). It was a pack of quite tightly-rolled fat quarters – so you couldn’t really see what you were getting – which worked out at £12 a pack or £20 for two. As a lady next to me was contemplating a pack at the same time, I said, “let’s buy them together and we both save £2”, which is what we did.

quilt_2

Sorry – terrible lighting, don’t really have anywhere I can photograph a quilt.

I had to improvise with the pattern a bit; originally I wanted it all to be colour and pattern with no plain solids in there, but I used up all the fabric and it was a bit small so I added the sashing in. The sashing is actually a pale turquoise left over from quilt two, which is quite handy.

quilt_4

At the edge of one of the pieces it said “Flea Market Fancy”, and I was just in the process of discovering that the collection was based on retro designs, when my boyfriend arrived home, looked at it and said ‘Nice… have we gone back to the seventies?” It *is* a bit seventies, but I still love how bright and cheerful it is. To be honest, they’re not the usual kind of fabrics I’d choose.

Which leads me to the William Morris quilt, which I started here. Believe it or not, I’ve actually finished the top of that too, just not had time to take the pictures. Next I need an expensive trip to the quilting shop, to buy batting and backing fabric.

quilt_6

Actually, looking at the light on these photos, it doesn’t do it any favours. I promise you it’s nicer in real life! This was a pile at the start of Saturday. It was a lot bigger by the end. For once, as I was making squares, I measured them up and trimmed them down properly.

tatting

On a more restrained note, I also got a little bit of time to tat the other week. This is a new pattern that I’ve been working on. Not there yet actually, but almost. And on that note, better run. More things to do.

Hope you had a good weekend too.


Zipping about with monkeys!

monkey__2

Hello! For a change I’ve been busy doing some crafty stuff over the last week, as I’ve had some time off – and it’s been brilliant. A proper chance to get the sewing machine(s) out and take a little ‘me time’. I really needed it actually, and I feel almost like a human being again.

Anyway, enough of that – LOOK AT THAT ZIP! I’ve been terrified of putting a zip in anything ever since Googling for zip tutorials and finding a hundred usually titled ‘don’t be afraid of zips’. Don’t be afraid? Well… I wasn’t. Should I be? At that point I realised zips were clearly impossible and I shouldn’t even bother.

About a year later I bought this pattern, which has three different patterns for zipped-bags. A weekend or two ago I had a quick chat with my Mum, who convinced me that my hand cranked Singer probably had a zipper foot, and so I thought this week was the time to get on with it.

monkey__3

Turns out that the Singer *doesn’t* have a zipper foot, a fact I discovered after cutting out the pieces and setting everything up. So, obviously I Googled ‘inserting a zip without a zipper foot’.

In brief: open the zip half way, when you hit the zipper pull, lift up the sewing machine foot, zip the pull past the foot and carry on. That’s it.

The pattern was really good, and well explained. I have no idea why, but it’s the only one I’ve seen where you’re able to see what you’re sewing as you stitch down the side of the zipper. All the other tutorials seem to cover up the zip with lining fabric. (Like this one, for example). I also like the neat fabric ends on the zipper – which you can see in the first photo up there.

I took extra care with the corners and managed to get my seams to match up. I did this by cutting out a square at the bottom corners, like this. I decided to try this as there are three layers of fabric in this pouch – outer fabric / lining / inner fabric and I was worried that the ‘pinching corners’ method wouldn’t catch each layer. I also have a problem with the pinching corners method leaving me with different sized corners. I’m happy to report that the new method worked much better for me.

monkey__5

And just look at this fabric! I was a gift and it makes me smile every time I look at it. I did have a little worry as I started that if I messed it up then I’d’ve wasted the fabric, but in the end, I thought perhaps it would bring me luck and make me take extra care. I’m happy to report that it worked out well and I love it! What a relief! My first zip.

monkey__1

I’ve also been working on my quilt, that I started so long ago. I think I’ve finished the quilt top now (on the John Lewis Mini Sewing machine) – but that’s for another post. And I’ve been knitting. I’m properly into this pattern now and at last am able to use my sock monkey stitch markers! Another gift that I’ve been waiting patiently to use.

Not only that, but I baked some biscuits and a cake. (A new habit I need to get out of.) And I did some tatting. A relaxed week, but busy with all the right things.

Hope you’re all doing well out there.

(PS: Congrats to Night’s Watch for completing her first half marathon. Amazing!)

Stealing the sunshine

autumn tatting

I’ve got some time to myself today, so this is a speedy post. I’ve travelled a bit for work over the past few weeks (one train journey alone was 5.5hours) so I’ve had a bit of time to tat. I’ve been getting to grips with layered tatting (often called ANKARS, I think) and using the tiny beads I bought. This is made with coppery beads and one of my favourite variegated threads in size 80, bought from Yarnplayer. I love how autumnal these colours are. I must admit, it feels like work stole the summer, so I’m looking forward to autumn.

sunshine on tattingThis is a test tat. I found a Tina Frauberger vintage pattern and I’ve been trying to work out the stitch count. Basically the book is in German – and I didn’t have it with me on my travels, so I guessed what I could. It’s not bad. Having the image in front of me will help get it right though! The sun was starting to come out as I took this shot.

pink tatting in the sun

And the sun made it out for this one! Same pattern as the one above – also in size 80. Its interesting actually, the hand dyed thread is much more sturdy than this one, not sure why. I don’t know if it’s the same thread (DMC special dentelles) , and the dying makes it stiffer, or a different basic thread to begin with? Either way, I quite like the difference. I wish the regular undyed thread was a little stiffer.

Same motif tatted in different stitch counts

I decided to make the same motif in a different size. I have half a mind to tat another and then join them to make a necklace… except that I don’t wear pink, or necklaces. We shall see.

size of size 80 tatting thread

Here’s an idea of the size of the smaller one. I see a lot of tatted earrings about at the moment, and I know they’re done in thicker thread. I can only assume that they’re stiffer, but HUGE.

Anyway. On with the day! I’m off to try and make the most of it, for once 🙂


Catching up

sept_1

Well, time certainly flies. Or at least it moves on, whether you’re having fun or not! I haven’t meant to leave it so long between posts, but work and weekends have intermingled a bit this summer, and I haven’t had a lot of time for myself. Also, the change in my morning commute has affected my productivity much more than expected—I’ve barely had any time to tat. I did manage to make this with a few snatched minutes while waiting for a lift to the station over the last week or so though, and I’ve enjoyed working with these petite seed beads. This is size 80 thread, and so the beads are smaller than regular seed beads.

sept_2

When I have had time to make things, for some reason I’ve gone for the mainly useless! I’ve made a few more stress  bunnies to give away — often to people who are stressed themselves, and last weekend I made a little time to try out this strawberry pattern. (Yes, hers are much neater than mine!) I actually tried this some time ago, but couldn’t get the hang of it at all. This time around it went much better – they’re not perfect, but there’s something about them that I really like. Lots of people make the cord stalk really long, so the leaf pokes out of the top of a book and the strawberry the bottom, but I decided the yarn was too thick and I got a bit bored Icording – so…

sept_3

What I have instead is a cord long enough to tie a little strawberry bundle. No use to anyone, but it makes me happy.

A few months back I did manage to make something more useful. I had a weekend to myself and so made this bucket-style drawstring bag

sept_4

The striped fabric is upholstery weight, bought as a cheap remnant. Its great for this kind of bag as it stands up on its own…

sept_5

I’m using it as a knitting bag, it’s big enough to keep quite a few balls of wool, needles and a printed pattern inside. Its also the kind of bag you can leave the ball of yarn in while you knit, to stop it rolling off.

sept_6

I was really pleased with the colour of the drawstring too. I saved it from a paper carrier bag – I can’t even remember which shop it was from now, but it was the perfect match! I always save these cords, they’re great for things like this.

sept_7

And finally, this is one of my sunflowers. I’ve grown about 8 this year and I’ve really enjoyed watching them grow. As I’ve been away for work quite a lot, every time I get home I’ve rushed into the garden to see how they’re doing 🙂 I’ve also grown chillies and tomatoes, and I’ve loved that too. I don’t know why I had a few summers off the sunflowers, but must remember to grow them again next year.

Hope you’re all well out there and have had a great summer. With any luck I’ll be back again soon.

No time like the present…

needle cases

I made these needle cases about a month ago. They’re very wonky, and I just rushed in and made them without thinking really—which I must admit, I really enjoyed.

scraps

I used up lots of little scraps and just made it up as I went along. I like the fact that one is really bright and cheery and the other…

case

Feels a little more muted, a little older, perhaps. I was of course using up my tatting; thought it might make a change from lavender bags! I made the brighter one second, and actually remembered to put some pockets in it. To be honest, had I been thinking I’d’ve added decent pockets to both, maybe in different orientations. That’s the only thing with being spontaneous, afterwards you think of all the things you could’ve done. That said, I enjoyed making them and I did actually need a needle case. (Although maybe not two.)

inside

The felt inside is SO cheap and nasty! It’s awful – thin and stretchy. I must actually buy some decent felt. Anyway – that’s not the point of this picture – the point is I used the scalloped stitch on my sewing machine to make the ‘pages’ look a bit nicer. It’s the first time I’ve used a non-standard stitch on a sewing machine, so that was very exciting. I’m still alive to tell the tale.

floor

This is what the kitchen floor looked like until about 10 minutes ago.

And the living room floor.

Why work in one room when you can turn the whole house into a tip?

About a year ago I bought a selection of beautiful William Morris fabrics. I love every single pattern—but to the point where I was thinking that I would never ever use them because I could never do them justice. I’ve looked at a million patterns, simple and complicated. I’ve decided what I’d do and changed my mind a million times. You know the saying ‘money burns a hole in your pocket’? This weekend the fabric finally did that to me and I just decided to get started.

The patterns are complicated so it needs to be a simple quilt design. I decided on a strip quilt and started cutting strips. Until I came across one pattern that would be better as a traditional patchwork, so I cut some squares. Then I cut some more squares. Then I couldn’t decide *what* I should do – and of course cursed myself for ‘rushing’ in. (Despite the months of deliberation).

Anyway:

block 1

In the end I decided to make blocks that are all this size, and then I will put the blocks together

block 2

I think this should work. It should use up the bits I cut at random and I can make each block relate to the previous one or any of the others and shuffle them about as I go along. I hope it’ll work anyway…

The good thing being that it’s not *for* anything. I like making quilts for snuggling up on the sofa, so whatever happens it’ll work for that. And once I’d decided that’s what I was going to do, I quite enjoyed it, and that is the point of it, really.

Sheesh. Why do I make everything so complicated?

Hope you’ve all had good weekends.

(Also, thanks to the new people who are following me. Feel free to comment, I don’t bite 🙂 )

Making a (lacy, beady) mess

mess

My journey to work has changed in the last couple of months. These days I can’t guarantee a seat, and often I need to change trains. In the past I had an unbroken journey of at least 20 minutes within an hour-1.5 hour commute. This means no tatting time. I have missed it, mainly because I’ve watched myself become like everyone else… someone glued to their smartphone. I catch up on emails, reply to the ones I can, think about the ones I can’t, think about the work just passed and work out how the day will pan out tomorrow. To be honest, I don’t think it’s at all healthy. I think we could all use a break, but this is the future we have invented for ourselves. Always connected. Always able to think about work no matter where we are.

oops

Yesterday I had some time at home. I listened (somewhat ironically) to a BBC show, The Digital Human, while I worked on the tatting pattern I made a while back. I really love this blue with the yellow beads, and wanted to see how this would work out. Actually, I think the blue could be a little stronger, it’s very pale—and how did it work out? As I went to finish it today I spotted yesterday’s wrong join. Its not possible to save it, so it’s one for the chop. I’ll keep it for a few days and then cut it up I guess, to save the beads.

You know what? It’s no biggie. If there’s one thing about tatting with thin thread, it’s that you have to take the rough with the smooth.  I was definitely tatting this one for the process, not the product. I wanted to keep my hands busy and at the moment work is exhausting, so I didn’t have the brain power to work a sewing machine to complete anything more complicated.

simple

I had some thread to use up at the end of the shuttle so I tatted this. I love these tiny pieces. Just need to work out what to do with them…

more

I like them so much I made a couple more. Sometimes, small, simple and satisfying is what you need.

crown

I tried out a simple crown pattern too, still needs some work, and I may or may not work it out. We’ll see. I don’t need it for anything, just idle curiosity. I’m tempted to embellish them with embroidery maybe? Dunno.

So really, I have nothing much to show for a fair few hours tatting. This weekend it’s been all about the process and not the product. That said, I look at the mess in that photo, and I look at the sunny table full of thread, beads and lace where I was working and I think ‘that’s ok; its pretty, it’s my mess and it’s enough for now’. I’m pretty lucky.

And with that, I should go for a run. I’ve been putting it off  *all day*. (Although guys, cut me some slack, I did go yesterday 🙂 )


Tatting, embroidery, colourwork and a swatch

urchins

Hello! Just a quick and varied update… I actually made this a while ago, but haven’t had a chance to post it here. It’s a lavender bag — of course — made with the little tatted ‘urchins’ and some simple embroidery. I often think this kind of fabric is too open, but it’s perfect for a lavender bag as it keeps the lavender in and lets the scent out.

lavender

Here’s a rather terrible picture of the whole thing. I used a linen strip at one end, and it’s also backed with linen. I quite like the more geometric nature of this, and when you see it in real life, it’s quite delicate. I was thinking of the running stitches of shashiko when I made it, which is yet another thing I quite fancy trying but haven’t had any time for…

beads

This was a quick experiment from this morning. The stitch count needs adjusting but it seems to work. Basically I’d not tatted around a central bead before so I wanted to try that. I think it’s ok on this thread (still the thread from Katy!) but anything thinner will probably be too much- it ends up disappearing inside the bead. These yellow beads I bought on a whim. They’re ridiculously bright, but they feel really ‘springy’ –  we’ve had daffodils and primroses recently, and there’s currently bright yellow dandelions everywhere. There’s also loads of bluebells in the woods, which are a complete delight:

bluebells

I’m using the bluebells as a bribe to get myself running regularly. It’s so lovely to run in the woods — we’ve had a little spell of sunny weather in the UK and the light through the trees, the bright blue flowers, and the smell of spring has been fantastic.

colourwork

That aside, I’m also doing a little knitting experiment. I thought I would try colourwork in the round as I need another case for a phone. I have an iPhone already and the new job insists I also have a Blackberry. It’s all very formal on occasion, and I kind of like to amuse myself with slightly terrible bits of hand knitting in my bag. I’m making this up as I go, both the structure and the pattern. Already I’m worried that the pattern is far too big for the size of pouch I need, so I’ll probably have to adapt it. I’m also worried  that the final thing will be too tight—but not *that* worried to be honest—if it doesn’t work I’ll use something else. The job itself is stressful enough with out worrying about hobbies aswell!

swatch

There’s also this, which I’m pretty sure is one of the loveliest things you’ve seen all day, right? I actually took this last week, its a swatch gauge for what *will* become my first knitted garment. I don’t know why but starting it seems terrifying and so I keep putting it off. It’s this Boardwalk pattern from Brooklyn Tweed. Everyone (on Ravelry) seems to find it really easy but… I’m just being an idiot. I just need to get on with it.

So there we have it. There is a bit more which I’ve not had time to write about, but nothing that can’t wait. Hope you’ve all had good weekends (long weekends here in the UK) and that whatever you’re doing is fun, tricky enough to be interesting but not tricky enough to make you worry about it 🙂

See you soon.