Yes, this post has something for everyone. Or at least something for everyone who likes a bit of craft – otherwise, look away now.
I was of course making a pig, last time I posted. It’s still at the head stage, because the Ipad refuses to display the second page of the pattern, and I’ve not really been sitting at my other mac, which displays it perfectly. I will finish it, but over Easter as I was away visiting family, I grabbed two balls of yarn and a hook and decided I’d try out some yarn I bought for monkey making a while back.

(Look at her there – relaxing mid-photoshoot! Honestly. It was quite hard to get her to pay any attentional at all.)
The yarn was £2.00 a ball and is Rowan hand knit cotton. I must admit, I don’t love it for this kind of thing, I’ve decided. Two main reasons:
• I crochet really tightly anyway (which is actually very good for making toys) but it makes some yarns tough on the fingers – and this is one of them.
• The stitch definition is a bit too good! Its an odd negative, I know, but I think sometimes the fact it shouts ‘I’ve been crocheted!’ can really get in the way of the character of the toy. Something a little fuzzier is probably better.
While I was away, I made all the boring no-brainer bits: ears, mouth, hands, feet and I started on the rest of the head. I finished the head in the week and today I forced myself to make all the limbs and sew it together. Sewing of course, being the worst job of all.
Usually I put scarves on my monkeys, but today, with sore fingers, I couldn’t face crocheting anything else. Out of the blue I decided to make a dress instead. The monkey is actually an odd colour in real life, and just as I was about to chop up some linen, my head said ‘umm, you’re doing this in a rush, with no idea what you’re doing. Use something you don’t care about’. For once I listened and used a bit of old sheet instead. I must admit, I’ve done a dreadful job on the dress sewing! It’s appalling – and worse – the monkey is trapped inside. I had to sew her in, which is something I really don’t like (it’s sloppy, I think). Having said that – Look at her! She’s hilarious. As I sat down to sew her in, I spotted the crochet flower – it’s been knocking about on my desk for ages – I crocheted it in tatting thread a while back.

I makes a big difference I think. Without it, she looks like she’s in very drab school uniform. Having said all that, I quite like the overall effect, and so I’m going to ponder on it all and probably remake the dress, but better. I did a quick google search before hand incidentally, and found this tutorial. It’s not brilliant, but gave me enough confidence to have a go. I didn’t pin anything or measure anything… it shows. Next time.
If you wanted to crochet your own monkey, I used this pattern again, and just personalised it a bit as I went. So that’s the crochet – and the sort of triumph, on to the tatting / sewing / failure next.
Before Easter I thought I would try making a ‘lunch bag’ style bag, to put tatting on. Most of the tutorials I’ve seen have all been for bags in one colour, but I wanted side panels on mine.

Only thing is, I also lined it, and by the time I’d finished, it doesn’t really fold over properly, which is really annoying. I think it’s all too small for the thickness of the fabric.

I know it needs a button – but even with it, it’s a very clumsy looking thing – so back to the drawing board on that one.
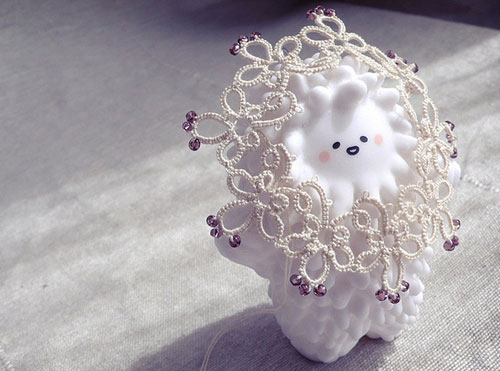
Also, I’ve been trying out using tatting for a brooch – and I’m not keen on that either!

This is it 3/4 done – but I’m still thinking about whether to finish it or take it apart. I made the edging in the week (my own pattern, for once) – but it’s really there to hide the fact the circle isn’t perfect. So… how do people make and hem circular brooches? Actually, even as I typed that I think I probably know the answer to that one. They’re better at sewing than me 🙂
Never mind. You don’t know these things till you try ’em.
In other more exciting news – I’m learning to knit! I asked specifically for no chocolate this Easter, and so instead of an egg, my mum gave me a massive ball of practise yarn, a pair of needles and some of her time in teaching me. She’s a brilliant knitter, but doesn’t enjoy it, so it was very sweet of her to put herself through it. What a lovely present. I’ve been forcing myself to get that monkey finished all week, so I can get on with trying to knit a scarf! I’ve got the basics of knit and perl, and I can just about cast on and off (with a bit of prompting). Needless to say I have grand ambitions but like all these things, *trying* to take it one step at a time.
Phew.

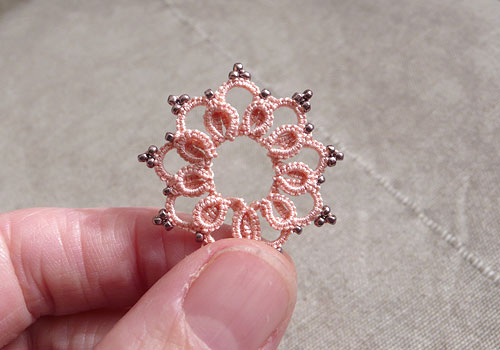
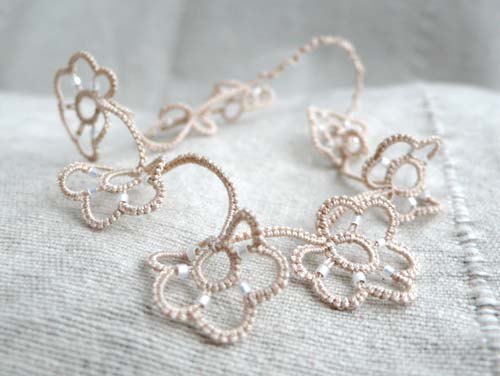
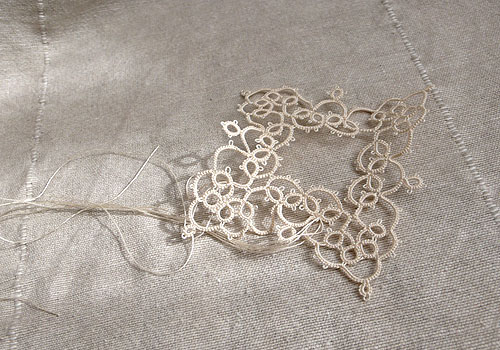 This is a test tat. I found a Tina Frauberger vintage pattern and I’ve been trying to work out the stitch count. Basically the book is in German – and I didn’t have it with me on my travels, so I guessed what I could. It’s not bad. Having the image in front of me will help get it right though! The sun was starting to come out as I took this shot.