Little woollen rabbits (I hope)

IMG_2197

Rather obviously, this is a work in progress. This is the Piebald Rabbit pattern from Little Cotton Rabbits. So far so good. The pattern is very well written, and I’m really hoping I can pull this off. I’m not 100% convinced it will be as lovely as hers, but if you never try these things you really never know.

What I am amazed about is how small he is! I guess I’ve only really ever seen these rabbits in isolation, so I thought they were biggish. Turns out when she says ‘Little Cotton Rabbits’ she’s not kidding! There’s a good and bad side to this.

Good side = I think if it works, it will be really cute.

Bad side = it’s *supposed* to be a gift for a new baby. It could be too small, or worse, I might decide that I like it too much to give it away…

We’ll see. This is of course assuming that I don’t screw it up. I decided to start with the body, mainly as I was due to go out last night and I knew I could pick that up and put it down again. I’ve made the complete leg, arm and foot today, and done the first batch of stitching. I did my best ever mattress stitch on the body, which I am very happy about. (That said, ‘best ever’ is really setting that bar low!) I didn’t do the arm that well, but I find it much easier stitching from the bottom up, rather than the top down. I’ll see how the second one goes. I’m giving it a break for now before my fingers fall off.

cascade 220

These are the yarns i’m using. It’s Cascade 220: Doeskin Heather 8012 and Aspen Heather 8011. They look different enough here, but knitted up they’re quite similar. I don’t think that will be a problem, but it does show the perils of just guessing how colours will work together when you buy them from photos online. I do like these colours though, they’re really gentle.

And on that note, time to run. More photos when there’s more to show.


Bearly there

bear

I can’t believe how long it’s been since my last post. I was so productive, and then suddenly it all went to pot! Not entirely sure what’s been going on. This is just a quick catch up, really.

I finished off this little fellow a couple of weeks ago. He’s sitting in an egg cup (a gift for ‘me’ from by boyfriend… While I like it a lot, I can’t help thinking this was’t entirely selfless giving).

When I finished this I wasn’t 100% impressed. I didn’t knit him that well, and to be honest, his body ends up a tiny bit pointy at the top, which gives him a weird neck. I tried to get around that when I stitched his head on, but it’s not great. Also, I made the scarf way to long. NO idea how that happened, because it was SO tedious to knit.

But… but…

bear 2

Despite all that, he’s actually *really* cute. Not neat enough to give away, but I really like him. I keep picking him up to have a little look. Might knit another one, but neater this time. Here’s the pattern on Ravelry. (Sorry about the quality of late night iPhone photos.)

tatting in colour

These are some rating experiments I’ve also been doing. I treated myself to some new threads (always DMC size 80 – just different colours). The colours are lovely. I’m trying to work out using beads in different ways and also, folded rings. In the ecru example I managed rather excellently to put the beads on the bottom row of rings rather than the top! This means you can’t see them. At all. That’s what happens when you start something new on a train after a day’s work, while not quite thinking. I like the beads in the centre of the folded rings though, so will persevere…

Right now, in fact.

Hope you’re having / have had a good weekend.


A herd of tatted lavender bags

tatted lavender bags

Do you think you could call them a herd? Not entirely sure, but they’re certainly gathering. Things have changed again work-wise for me, so I’m back to a regular commute. Even better, I’m back to a regular commute that more often than not affords me a seat, which is great news. It’s also exceptionally slow, due to engineering works, which is less great (but very British, to be honest). This means I have more time to tat.

Tatting on my leg

There you can see an over processed iPhone photo taken while I was tatting on the train. I’ve been working on my own patterns a lot, using the ANKARS technique of overlapping rings. I must admit, I’m really enjoying it.

Adding beads

This bit is always less fun – not sure why but the sewing drives me a little nuts. Some beads I add as I tat, others I’ve started sewing in at the end…

Waiting...

Last weekend I finally had enough time, and enough semi-complete pieces to get out the sewing machine. What I *didn’t* have is any fresh lavender. The stuff I have is getting on a bit now, and I was a little concerned. That said, it’s performed admirably, and the corner of the house where they’re currently all piled up smells amazing.

Envelope back

I decided to go for envelope backs on the bags – partly due to the concern of the lavender not being fresh and needing to be replaced, and partly because it gives me a higher chance of finishing the edges neatly. If you do it like this, there’s no need to hand finish the edges! They also look kinda cute – but I neglected to take a photo… sorry about that.

result

In the end I made six complete bags. I have another two that still need to be stitched on to fabric – and I got some new thread at the weekend, so there could be more to come. Not 100% sure what to do with them all right now, but… well… as I said, that corner of the house smells amazing.

collection

And there’s still more tatting knocking about that needs to be ‘dealt with’… But as it goes, there are worse things to worry about.

Zipping about again

I bought this bird fabric a while ago on Etsy, on a bit of a whim. Today I decided I was going to make a zip pouch, and the plan was absolutely to use up the green fabrics I had left over from the spaceinvaders monitor cover the other week.

pouch_1

Then I opened the drawer to get out the cotton twill I bought ages ago for interlining, and saw the bird fabric and changed my mind. Its really lovely. Its almost like a very stiff linen, it’s not a regular cotton print. It actually creases really easily so it’s been ironed a million times. Its stiffness makes it great for something that might get thrown about a bit but its excellent creasing ability is a bit of a pain.

zipper_1

I had this pink zipper knocking around, which is actually not a bad match for the details on the birds. That said, it can look a bit too pink in a certain light. But hey, it’s just a zip, and I kinda like it being so bright – it feels like a feature.


zipper_2

Last time I made a pouch I used the hand-cranked Singer sewing machine, because I thought it had a zipper foot. It didn’t. This time I used the John Lewis Mini (its a bit like this) and it is also without a zipper foot. Actually I think that Elizabeth’s Hartman’s Zipper Pouch Pattern is so good that if you follow her instructions you can live without one. I’m sure it’s not perfect but it seems to work for me.

Its a great pattern, and I like the nice neat ends it gives the zipper. (Although you can see the stitching is a wee bit wonky there!) I must admit – I didn’t do a great job on the zipper pull. I found topstitching it really tricky – its not at all straight, but I’m trying to ignore that. I didn’t make a pull last time.

both

Here’s the first and second side by side. The monkey pouch is full of ribbons! It puts a smile on my face for the fabric AND the contents 🙂 Not sure yet what I’ll keep in the bird pouch. Looking at it now, I kinda think it looks better in real life… you’ll have to trust me on that. I’m not sure why I like zipper pouches so much, but there’s something really nice about them. There’s a woman on Etsy who screen prints fabrics which I really like, and I’ve almost bought a pouch from her a million times. I stopped myself because I don’t really need more, and the shipping is a bit expensive from Canada. If you live a bit nearer though, I think her work is lovely.

neat

Sorry – this is a totally gratuitous shot, and it’s not even from today. Look at it! Its so neat! I doubt I’ll ever match that on anything ever again.

Anyway…

tatting


Still experimenting with tatting patterns, but that’s for another post.

dodge

Annnnnd, I made some jammy dodgers in a fit of trying to seem productive on a day when my leg was driving me a little nuts. Hope you’ve had a good weekend wherever you may be.


Quilt invaders

colour_1

Its been another quiet weekend here as my other half left last Thursday to work in Barcelona for a few days. I mentioned previously that I’ve been working from home for a few weeks – I’m actually working in the kitchen, hooking up my laptop to a monitor which seems to’ve decided to move in. I’m not sure how we got from a nice empty (usable) kitchen table to one half full of tech, but it’s been handy for me, so I probably shouldn’t complain.

pixels

Its a nice new monitor, and my boyfriend has been bugging me to make a cover for it, to stop it getting dusty on the rare occasions we’re not using it. I’ve got an awful habit of making things we really don’t need, and nothing we actually *do,* so I felt obliged on this occasion to come up with the goods.

On Thursday I decided I knew what the weekend project would be, and hurriedly placed an order with M is for Make.

The fabric arrived on Friday, which was spectacular service and just what I’d hoped for. Its hard choosing colours from snapshots online, but I went with Kona Cotton: Lime, Emerald and Coal. The colours are really intense. I was super happy when I opened the envelope—and wondered why I’d not considered making a plain quilt before. I think I might try it. Anyway…

Can you tell what it is yet

Can you tell what it is yet?

diagram

I chopped the fabric up into 2″ squares, and used them as pixels. I even made a proper effort and plotted out the pattern into six different nine patches, plus extras. (Although not very neatly, as you can see). In the unlikely even you want to do something like this yourself and the pattern would help, leave a note in the comments and I’ll email it over (I’ll tidy it up first).

invader

Having plotted it out, piecing it was really fast. It’s easy to chain the ‘pixels’ together as you go, so for example, pixel 1 and 2 of the first square, followed by 1 and 2 of the second, third, fourth, by then you can add the 3rd pixel to square one, etc. Before you know it, you have the first line done.

bigger invaderI decided it would be more interesting if the invader wasn’t central, so pieced him over to one side. I’d love to share my measurements but I didn’t really make any…

strip

Which is why after I’d pieced everything together it turned out too short, so I had to add an extra strip on the bottom. (I’d bought this fabric at the same time, to co-ordinate but until that point had no need of it.)

back

I’d love to share my method for putting this together, but it was awful. Frankly I have no idea what I’m doing. The back (seen above) needs to be shorter than the front to allow for cables etc, which completely flummoxed me, I’ve got no idea why. Looking back, I should just’ve stuck to a method like a bigger version of the needle case with a pocket but I went down some insane route that I can’t even begin to describe. Anyway. Don’t do that.

inv5

Here’s a pretty terrible shot of it in situ, with what looks like avery unhealthy cheeseplant in the background. Don’t worry, it is actually healthier than it looks…

Overall, it’s functional, I love the colours, and I’m very pleased with the invader. I’m a wee bit frustrated that I did such an awful job of putting the rest of it together, but you live and learn. It’s also put me in more of a mind to make the pixel skull quilt that I promised to my boyfriend an age ago…final


Tatted sketches

beads

I’ve been working from home a lot recently, which has meant getting three hours of my day back. It turns out the commute from upstairs to downstairs is a lot quicker than the 3 hour round trip to the office. In the first few weeks I picked up a good habit, which I’ve swiftly lost — taking that time for myself. Starting the day with a cup of tea and some tatting instead of standing in the queue for a bus. Must try and pick that up again this week.

beads_2

I was working on a pattern for earrings. It’s still not right really — but trust me they look much nicer in real life! The grey thread makes the silver-lined beads look like water droplets; it’s a really pretty combination. That said, I had shuttles full of ecru thread so carried on experimenting with that.

beads_3

I’d really rather tat with size 80 thread, so I ended up adding lots of beads to see if that made the earring feel more substantial. It does make it a bit stronger, but I think more experimentation is needed. I do love the patterns of some of the bigger tatted earrings out there, but the finished size is just too big for me!

beads_4

This is what it looks like on – horrendously wonky, but I’m guessing changing the stitch count will help. I’d like to play around more with layered tatting too, as that will make it more sturdy. Trick at the moment is not to go up a thread size and see what I can do with what I’ve got.

We shall see.

Bags of joy (or craft as therapy)

bag_1

It’s been a weird month or so. My partner has been travelling a lot and for a boring health reasons (herniated disc) I’ve been stuck at home. Like many people who work in London and live in a town outside I don’t really know anyone locally. The last few weekends have stretched out endlessly – but in a bad way. When you’re feeling super-cheerful, a free weekend feels like a brilliant opportunity. When you’re a bit fed up, it feels like it will never end. Social media doesn’t always help – perfectly posed photos of friends having amazing times, going places and doing things, and there you are home alone, climbing the walls (or you *would* climb a wall, if you were able to stand up).

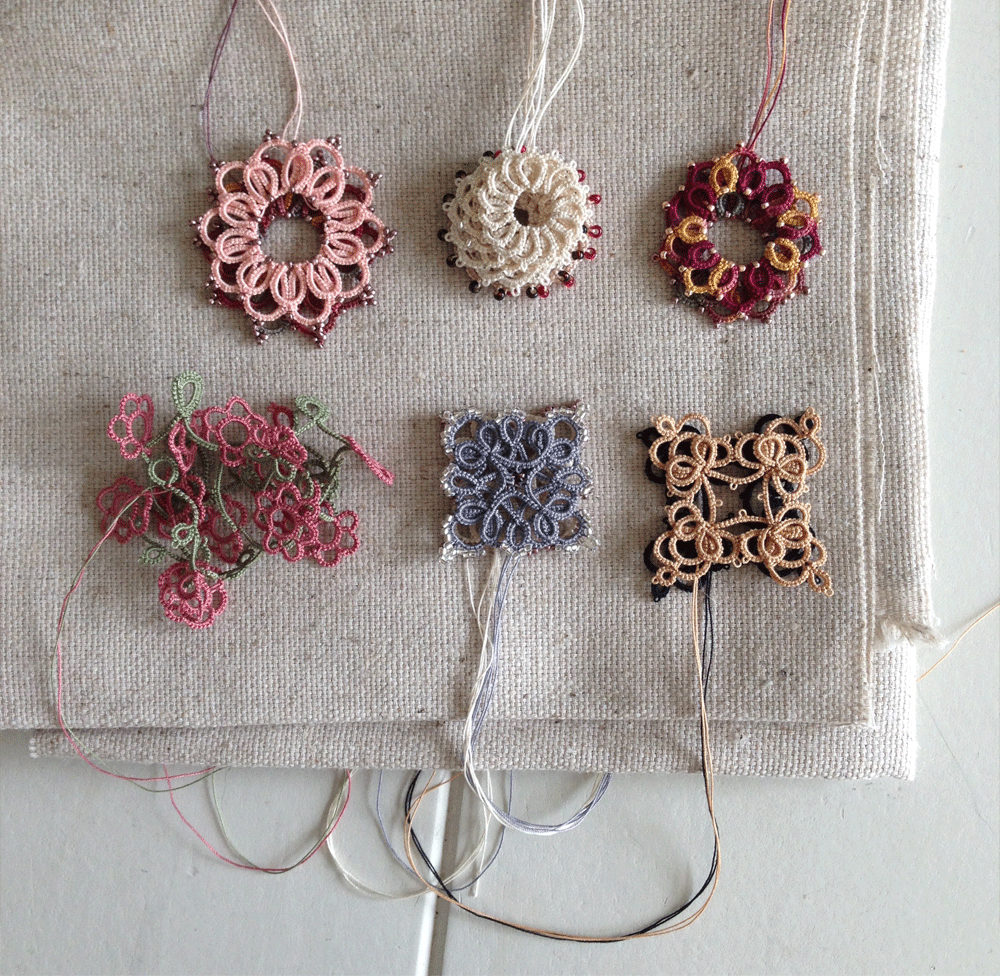
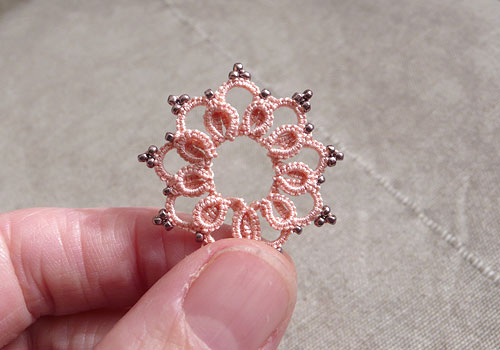
There’s a lot been written and researched into the therapeutic effects of knitting and/or making things; here’s one article. Google and you’ll find loads more. I have to say I agree completely. I find that tatting and knitting both require counting, which calms a busy brain, and that sewing is good because often the projects are started and finished in a day and you really feel like you’ve achieved something.

There is no physical position I can get in that is pain free at the moment (can’t sit on the sofa, can’t lie down) – BUT on the upside, the closest I can get is a hard chair at the kitchen table, as long as it’s not for too long.

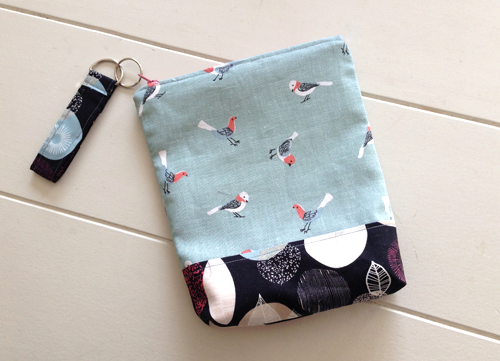
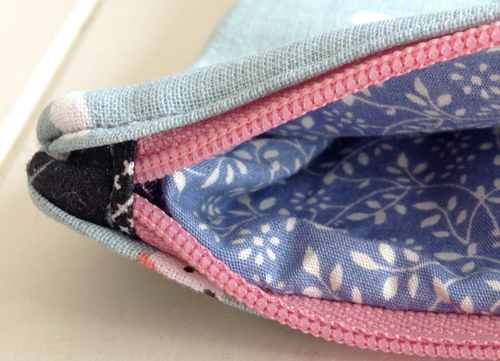
I decided this was the perfect weekend to make the most of a few things aligning: free time, no interruptions, a free kitchen table. What did I plan on making? Another zip top bag. What did I make? A drawstring bag!

bag_2

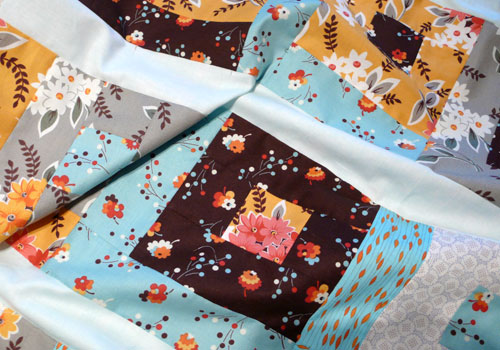
I’m really pleased with it, even if I do say so myself. I bought this the Elementary Mini Charm Pack from Moda just before Christmas. I’d sort of said that I would make my partner a quilt, but the one I have planned needs some black fabric. I bought the charm pack as a tester to see what would and wouldn’t work. I must admit, it’s a really nice pack. You get 42 squares in total – which when they’re all laid out, is quite a lot.

The zipped pouch I was going to make would only take 4 of these squares and when I put them together, it seemed like a shame. It felt like it would be nicer to put a few more together and make something bigger.

bag_3

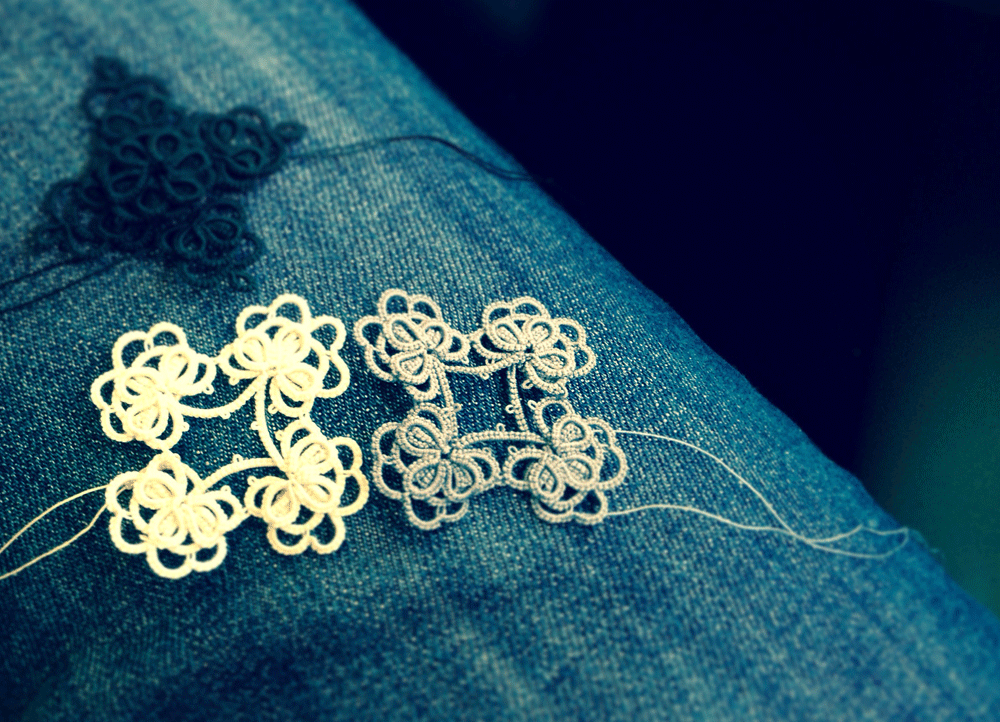
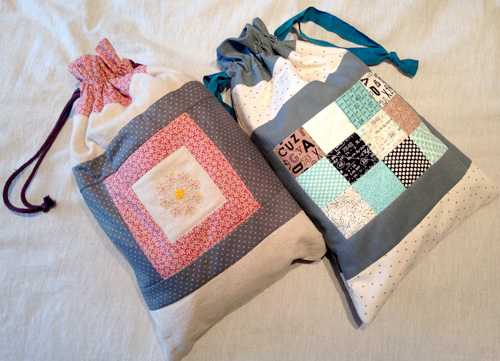
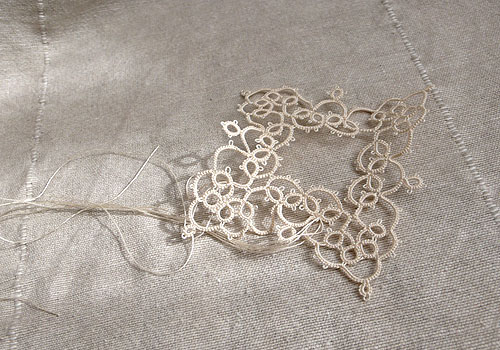
I made this drawstring bag in 2013, and I use it all the time. It’s quite big, and of all the things I’ve made, it’s the thing I enjoy using the most. (Although I think that could be because most of the things I make aren’t that useful!) It’s tatted and embroidered – which despite being a bit flowery for my tastes I really like – and thinking about it, I wonder why I’ve never repeated? Anyway. I decided to make another bag roughly the same size.

bag_4

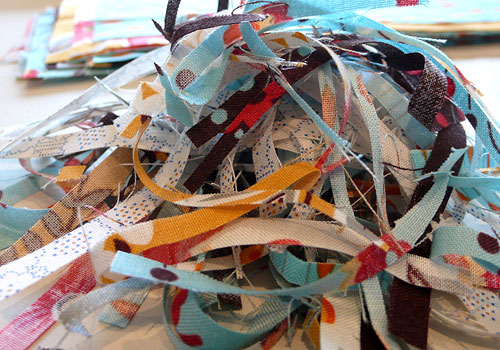
(Sorry for rubbish iPhone photos – the blank patchwork square actually has a pattern on it!). I didn’t measure anything – I just started with the charm squares and went from there. I ALMOST had a wobble when the charm squares were put together and the grey border added… would make a really nice quilt, but I decided I wanted to finish something there and then and actually, I have a use for the bag already. The white fabric with tiny blue stars was a speculative purchase ages ago, the grey fabric was in my stash and I managed to cobble just about enough calico together to line the inside. The ribbon handles I found in the back of a drawer – I was really pleased as they’re not a bad colour. I think they’re the handles from a posh carrier bag. (Always save those ribbons and cords, they’re usually just the right size for *something*).

bag_5

In terms of construction, I used this tutorial again, I quilted the main section after the patchwork was complete and before I started putting the panels together. By which I mean I stitched through the front straight on to the batting, with nothing behind it. The top grey section has iron-on interfacing to make it stronger, as it’s the bit that gets the most stress. Inside it’s just basic calico, which is heavy duty enough, and cheap, of course. I actually didn’t do a *terrible* job of that top stitching on the outside – but yes, I was too lazy to hunt for a more discreet thread colour.

And thus, mission completed. Just the right project – took long enough, but not too long. Required the right amount of sitting, but enough to keep that spine moving, as you need to get up and iron things, or chop things up. It also needs a bit of thought, but not enough to make you worry about it.

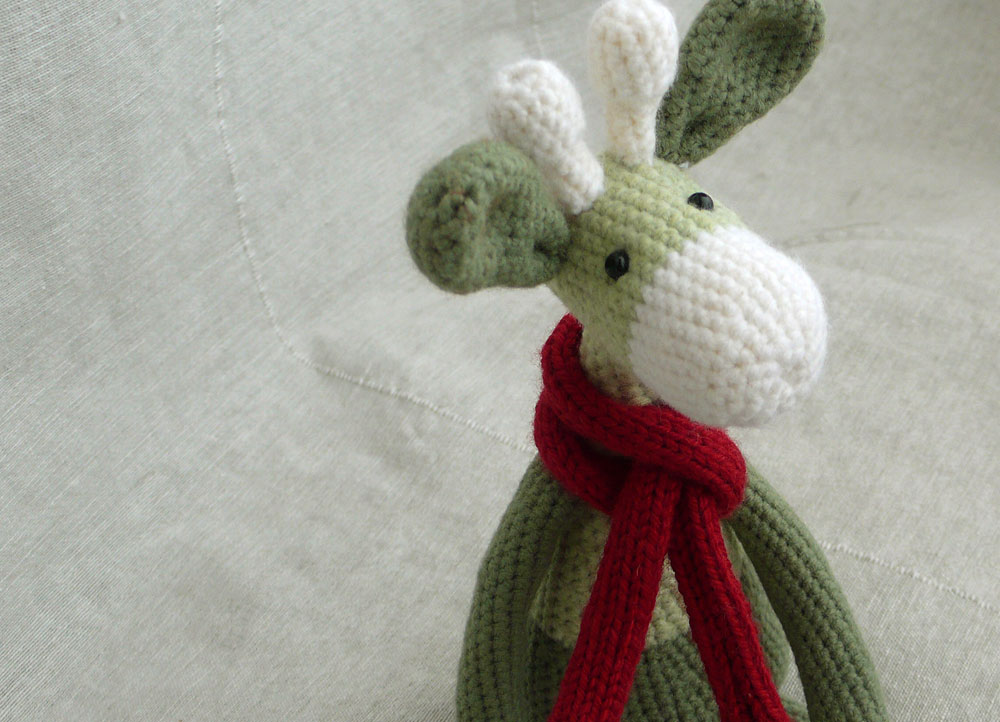
If you need  a project to cheer yourself up, and you like sewing, I would recommend it. (If you like knitting, I would recommend a hedgehog.) I’m hoping though, that if you are sewing things, you’re happy both before *and* after you start!

Here’s to it, us and making things.


Knitting and crochet, the best of friends

Knitting and crochet

This wee fellow is off to a new home tomorrow. He’s going to live with a little three year old girl, called Scarlett. I would be more concerned, but she’s taken excellent care of the monkey I made her in 2013, so fingers crossed! I hope she likes him and plays with him as much, and as carefully (!) as she does with the monkey.

A naked giraffe

Here he is, as naked as the day he was born, in all his crocheted glory. And looking rather embarrassed about it too. It’s a lovely pattern – although as ever, crocheting arms and legs drives me  bit nuts. I always end up missing a stitch somewhere along the way and having to add one or two back in later. If you are in any way giraffe inclined though, I would recommend the pattern and you can find it here. I chose green for mine, because I think it’s nice for little girls to know that colours other than pink are available!

Giraffe scarf

True to form, I made a giraffe scarf. It actually matches the one I made for the monkey, but I think that’s purely because I used the same logic by accident – “I should probably add something scarlet”. I’m nothing if not original…

But then I thought he looked a bit naked. And maybe a little cold. But what to make to warm up a giraffe, other than a scarlet scarf?

Jumper

A wooly jumper of course!

I was in a bit of a rush, as I desperately wanted to finish this in time for Scarlett’s birthday, so I chose a basic, one-coloured pattern. I was also worried I wouldn’t know how to make it, so I thought the simpler the better. In the end I went for another pattern from Little Cotton Rabbits and it’s great! It’s knitted flat, and you start with individual pieces, which come together at the chest. You have to stitch it together of course, but its not hard and looks great.

jumper backAnd look! There’s a little button fastening at the back, which means…

Arms up!

That it’s easy to get on and off again! Quite important I think.

I adjusted the pattern a little bit – longer arms etc – and I think if I were a more skilled knitter I’d’ve taken it in at the sides to suit his body shape a bit more, but in the end, I was quite pleased with it. It looks nice and cosy. The button at the front is just for decoration, incidentally.

Suave and warm

And so there he is. All nice and warm and ready to meet his new friends.

You know what’s also a little funny about this? This is the first jumper I’ve ever knitted! And yes, I am still working on the Brooklyn Tweed Boardwalk pattern, from ages ago! Must get started on that again now.

Patchwork and tatting to beat the rain

quilt_3Hello! It’s a wet and windy weekend in the UK, and due to my other half being away for work I’ve had time to get on and make an eye-wateringly cheerful quilt top, in record time. Not only that, but it’s much less wonky (so far) than my previous quilting efforts. I bought this fabric at the Knit and Stitch show in Ally Pally (London). It was a pack of quite tightly-rolled fat quarters – so you couldn’t really see what you were getting – which worked out at £12 a pack or £20 for two. As a lady next to me was contemplating a pack at the same time, I said, “let’s buy them together and we both save £2”, which is what we did.

quilt_2

Sorry – terrible lighting, don’t really have anywhere I can photograph a quilt.

I had to improvise with the pattern a bit; originally I wanted it all to be colour and pattern with no plain solids in there, but I used up all the fabric and it was a bit small so I added the sashing in. The sashing is actually a pale turquoise left over from quilt two, which is quite handy.

quilt_4

At the edge of one of the pieces it said “Flea Market Fancy”, and I was just in the process of discovering that the collection was based on retro designs, when my boyfriend arrived home, looked at it and said ‘Nice… have we gone back to the seventies?” It *is* a bit seventies, but I still love how bright and cheerful it is. To be honest, they’re not the usual kind of fabrics I’d choose.

Which leads me to the William Morris quilt, which I started here. Believe it or not, I’ve actually finished the top of that too, just not had time to take the pictures. Next I need an expensive trip to the quilting shop, to buy batting and backing fabric.

quilt_6

Actually, looking at the light on these photos, it doesn’t do it any favours. I promise you it’s nicer in real life! This was a pile at the start of Saturday. It was a lot bigger by the end. For once, as I was making squares, I measured them up and trimmed them down properly.

tatting

On a more restrained note, I also got a little bit of time to tat the other week. This is a new pattern that I’ve been working on. Not there yet actually, but almost. And on that note, better run. More things to do.

Hope you had a good weekend too.


Stealing the sunshine

autumn tatting

I’ve got some time to myself today, so this is a speedy post. I’ve travelled a bit for work over the past few weeks (one train journey alone was 5.5hours) so I’ve had a bit of time to tat. I’ve been getting to grips with layered tatting (often called ANKARS, I think) and using the tiny beads I bought. This is made with coppery beads and one of my favourite variegated threads in size 80, bought from Yarnplayer. I love how autumnal these colours are. I must admit, it feels like work stole the summer, so I’m looking forward to autumn.

sunshine on tattingThis is a test tat. I found a Tina Frauberger vintage pattern and I’ve been trying to work out the stitch count. Basically the book is in German – and I didn’t have it with me on my travels, so I guessed what I could. It’s not bad. Having the image in front of me will help get it right though! The sun was starting to come out as I took this shot.

pink tatting in the sun

And the sun made it out for this one! Same pattern as the one above – also in size 80. Its interesting actually, the hand dyed thread is much more sturdy than this one, not sure why. I don’t know if it’s the same thread (DMC special dentelles) , and the dying makes it stiffer, or a different basic thread to begin with? Either way, I quite like the difference. I wish the regular undyed thread was a little stiffer.

Same motif tatted in different stitch counts

I decided to make the same motif in a different size. I have half a mind to tat another and then join them to make a necklace… except that I don’t wear pink, or necklaces. We shall see.

size of size 80 tatting thread

Here’s an idea of the size of the smaller one. I see a lot of tatted earrings about at the moment, and I know they’re done in thicker thread. I can only assume that they’re stiffer, but HUGE.

Anyway. On with the day! I’m off to try and make the most of it, for once 🙂