Travelling elephants

eles

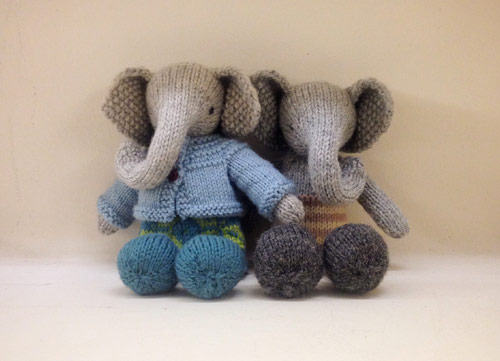
Well, it was obviously going to happen… one elephant would become two. Nell (on the left) is joined by her new – I guess, technically speaking, Greek sister! We moved to Athens at the beginning of the month, and I couldn’t quite bear to leave Nell behind, so she packed her trunk and came with me. I had some time on my hands last weekend in between going here for a quick run…

stadium

and here for a quick look at the view…

lycabettus

So got I out the knitting needles.

I’m just in Greece for work for a few months, but renting an apartment, which makes it feel a little more like home. I thought long and hard about what crafty things to take and settled on some wool for toy making, as I’ve been enjoying it so much. I even managed to squeeze in some toy stuffing! No buttons though…

wait

(I like this photo. The light is terrible but it looks a little like Nell is saying “Wait… I think someone is coming. Pretend you’re just a toy!”)

Actually the wool I bought is good for the bodies but too heavy for the clothes. The pale blue dress is quite thick – it feels like it would make a nice jumper for me, but is a bit too much for a small elephant. I should get some cotton, as the pattern recommends.

I’ve really enjoyed making these though. I must admit, I find stranded colour work a little stressful —so much counting and the threads get all intertwined, which drives me a bit nuts. I love the look of fair isle but how it doesn’t drive people insane I just don’t know.

I’m not sure how much time I’ll have over the coming months to knit some more, but I was wondering if I should make a girl rabbit next? My own wee rabbit is all packed away in England, but maybe he’d like me to bring back a friend? We shall see.

I also got a chance to do a speedy bit of tatting the other day. It feels like it’s been AGES. So long in fact that I’d forgotten the pattern. Once I got going it was fine though:

tatting

That said, I completely forgot to string any beads!

Getting dressed

dressed_1

Yesterday was a bit of a weird one here, a bit disjointed. Weirdly I ended up with a  lot of time to sit and knit while the world moved awkwardly around me, and so I set to work making Nell’s dress. (I’ve decided she’s called Nell. She doesn’t seem to mind).

While there is a dress that comes with the elephant pattern, I really like the dresses I’ve seen on Ravelry with capped sleeves, so I splashed out and bought the seasonal dress pattern, which has lots of different charts. Deciding which chart to go for is tricky, and in which colours—and then if you’re going to modify the way you use the colours… there’s a lot of choice. In the end I went for the blue to match the shoes (probably wouldn’t match shoes and main colour of dress again actually – which she’s sitting down there’s a lot of blue) and added the brighter green to make it a bit more cheerful. I knew I wanted the green at  the top.

nell_dressThe given pattern for this dress has a solid colour all the way to the top – so I wasn’t completely sure when I should switch. The capped sleeves are made by wrapping the yarn to create more stitches, something I really wasn’t convinced I would get to work. Despite that, for some reason I decided to change when purling in to these wrapped stitches—and as it happens, it gives a really nice contrasting edge to the sleeves! Amazing. Anyone would think I had some idea what I’m doing (I don’t.)

nell_feet

I also added little buttons to her shoes. I wasn’t 100% sure I’d be able to do that, but knitting is so much more flexible than crochet it wasn’t too hard to bend her feet around and squeeze the needle through. I love these teeny tiny buttons. The people that make them must be amazed that anyone can find a use for a button so small.

friends

You can see that I need practise on the colour work – the tension is a bit ropey. Also you *really* need to concentrate! I used the point of a pair of scissors to point at every stitch on the chart as I worked, otherwise you look up for a sec, look down and have no idea where you are.

The pattern actually recommends cotton for the elephant and the clothes. You can see that I’ve used wool for both, as that’s what I had available. I like Nell (the elephant) in wool, but you can already see that the dress is way too fluffy (and will probably pile). It kind of loses the detail. Seeing as I’m already planning more—they’re really addictive—I’ll probably use up the wool I have but think about buying cotton to try at some point.

final

After making the rabbits, I honestly didn’t think I could be more thrilled with a toy, but I’m so pleased with her! The pattern is amazing. I really didn’t think you could get knitting to be as nicely 3d as you can with crochet. And no DNPs! The construction and shaping is really clever. I have no idea how long it must’ve taken Julie to figure out these patterns and then write them down, but she deserves every penny and all the praise she gets! I won’t say they’re easy, but they’re definitely manageable, and watching them come together is a lot of fun.

Question now is… do I make her a little cardigan as well? Maybe I should actually do something useful first, like clean the house… Hmm.

Happy sunday!


The eyes have it

elephant_1

After the total joy of making two rabbits (one hopefully now settled into his new home) I decided to take a risk on an elephant. I say ‘take a risk’ as she looks pretty complicated to me—I didn’t want to just assume this would be a breeze, and then get super frustrated. I still consider myself a new knitter to be honest, and there’s lots of techniques I don’t know or need to look up each time.

With the bunnies I started on the feet as they seemed like the most complicated part. With this one I started on the head, because if you can’t get that right you’re kind of stuck. My first effort was shaping up nicely… until I realised I was rushing a lot and had missed a complete 10 rows! I’d already got onto the ears and couldn’t work out why there were so enormous. They weren’t, her head was too small. I started again.

elephant_2

The second time, I found shaping the trunk a little hard – you need to pull on the wool that you’re sewing the seam with, to make the trunk curl. It snapped. If you’re doing this yourself, I’d definitely recommend strong yarn for that bit of seaming (as it says in the pattern), or curling it about 10 stitches a time as you sew, instead of in one go when you get to the end.

Once I’d made the head, I stitched the eyes… And I just didn’t like them. Eyes are SO important, and can really make or break a toy (as I know I’ve said before.) They just weren’t in the right position. After living with them for a day and looking at everyone else’s in Ravelry I decided to unpick them. Then she had no eyes for a couple of weeks. At this point I was kind of disappointed as I just didn’t think I’d get them right, but I made the rest of the body anyway.

I was going to give her solid coloured tights and then changed my mind, which is why she has that darker blue band around her tummy. Also, I changed colour too soon – there’s a rogue dark blue row that shouldn’t be there. I found the shoes relatively easy to knit, but tricky to sew together neatly. One is good, the other not so good. They definitely get better with practise I think. Same goes with stitching the legs to the body.

I’ve looked at a *lot* of others on Ravelry and there’s definitely a technique to attaching the legs to the body that I don’t have yet. But that’s not so bad… a good reason to make another one!

elephant_3

With the eyes I suddenly had a brainwave – its not that much of a revelation to most, but it worked a treat for me. I got some pins with the round plastic balls for a head. I spent ages positioning and repositioning them. Finally when I thought they were in the right place I stitched the knots in — and it worked! She went from being a bit of a problem to something I was super excited about making. It’s amazing what a difference it makes! It transforms a project from ‘some knitting’ into a little character of her own.

Last night I stitched her all together. (Probably not a good idea after a long day but I had a free evening.) I’m so pleased with her! Looking at the attachment of the legs to the body this morning I’m a bit less thrilled, but she’s such a lovely little character. I still can’t get over the fact I’ve managed to get enough skills to make something so nice. It’s like being given a gift. I’ve really enjoyed making her (despite the ups and downs) and there’s still a dress to come.

There’s something brilliant about being really into the thing you’re making. Its so nice to have something non-stressful to think about. I think it’s something to do with gaining new skills too, you think about it a bit on the way to work maybe, instead of worrying about this document or that meeting. You sneak a few rows in here or there and get to see a bit more life come to pass…

And on that note, time to start the 90 minute commute and think about what colours her dress should be. Hope all’s well with you.


And then there were two!

two

Happy New Year! Hope you had a good break over the holidays and your new year is going ok so far.  I’ve not been the best blogger, I have to admit, but wow, December was busy. In between work and travelling for work I did manage to race through some knitting.

I made this little chap:

whale.png

He is, I have decided, the gift for the baby I was knitting the original rabbit for. After thinking about it, I decided that you need something a baby can have a bit of a chew on, chuck about a bit, squeeze and pull in any direction. Something a more solid shape and construction seemed like a better idea, and so I went for this pattern. (Ravelry link).

Overall I enjoyed making him… until I got to the tail. It’s knitted on DPNs and just didn’t end up as neat as I would’ve liked. I also decided to sew on fabric eyes, rather than the usual plastic eyes (better for a baby). This was a bit of a pain as it turns out the black ‘craft felt’ from John Lewis is thin, disintegrates quite easily and is just… not very good quality. A lesson learned.

full_length

And back to the rabbits… What a delight to knit! I’m genuinely thrilled with how they’ve turned out. Of course there are things that could be better and neither was completely struggle-free but still they make me smile every time I look at them.

single

The pattern is from Little Cotton Rabbits. It’s the boy bunny with the piebald patch, although on these occasions I added the nose but not the patch. (I did make one head with the patch but wasn’t 100% happy with it. I’ll try it again another time though, because it is very cute). I just happened to have blue and white wool available for the jumpers and so I used that to match the pattern exactly.

They’re such a lovely size. They’re also exceptionally cute without being ‘twee’; no cartoony cutesy short cuts – no big eyes or overly large heads. Something about them being small but perfectly proportioned makes them even nicer.

I made the one with the scarf at the request of an ex-colleague. He said that the only thing his wife had said she actually wanted for her 50th birthday was “one of your knitted rabbits”. Which was of course very flattering but having only ever made one before I did say he’d have to turn a blind eye to the odd wrong stitch!

bums

Here’s a slightly odd picture of their bums! They each have a little tail that pops out of their shorts. You can also spot the tiny button I used to close their jumpers. I love that you can take these on and off. Seriously – the jumpers themselves are so cute they almost give you a heart attack.

If you’re thinking of making one for yourself and wondering if you can do it, the answer is yes, you probably can. The patterns are well written and illustrated with photos. Anything that isn’t a knit or a purl is also explained and very easy to google for a video tutorial should you need it. They’re knitted flat and stitched together, which for me made it even better. While I hate sewing, I hate small knitting on DPNs even more. Knitting them flat was almost – dare I say it – relaxing.

They take a while to stuff and to sew together, but personally, I found it easier / more enjoyable than sewing a crochet amigurumi. I crochet really tightly and getting a needle through crocheted fabric was always a horror. I did actually make the second rabbit and decide I wasn’t happy with the eyes. After a lot of ‘Really? At this hour? GO TO BED’ internal dialogue I decided to snip them out and redo them. I’m glad I did, he’s much nicer now. It’s always worth taking extra time on faces I think, no matter what type of toy you’re making.

If there was one problem with this pattern I would say that it’s *really* addictive. They’re now all I can think about. I’ve already bought the pattern for the elephant though, and so will try that next. I must admit, I’m not expecting to do so well on that one, so will definitely start with the head first and see how it goes. (For some reason I started with the feet for the rabbits).

Anyway. Happy new year! Here’s hoping we always have a chance to sneak in a little bit of time for ourselves this year.


A herd of tatted lavender bags

tatted lavender bags

Do you think you could call them a herd? Not entirely sure, but they’re certainly gathering. Things have changed again work-wise for me, so I’m back to a regular commute. Even better, I’m back to a regular commute that more often than not affords me a seat, which is great news. It’s also exceptionally slow, due to engineering works, which is less great (but very British, to be honest). This means I have more time to tat.

Tatting on my leg

There you can see an over processed iPhone photo taken while I was tatting on the train. I’ve been working on my own patterns a lot, using the ANKARS technique of overlapping rings. I must admit, I’m really enjoying it.

Adding beads

This bit is always less fun – not sure why but the sewing drives me a little nuts. Some beads I add as I tat, others I’ve started sewing in at the end…

Waiting...

Last weekend I finally had enough time, and enough semi-complete pieces to get out the sewing machine. What I *didn’t* have is any fresh lavender. The stuff I have is getting on a bit now, and I was a little concerned. That said, it’s performed admirably, and the corner of the house where they’re currently all piled up smells amazing.

Envelope back

I decided to go for envelope backs on the bags – partly due to the concern of the lavender not being fresh and needing to be replaced, and partly because it gives me a higher chance of finishing the edges neatly. If you do it like this, there’s no need to hand finish the edges! They also look kinda cute – but I neglected to take a photo… sorry about that.

result

In the end I made six complete bags. I have another two that still need to be stitched on to fabric – and I got some new thread at the weekend, so there could be more to come. Not 100% sure what to do with them all right now, but… well… as I said, that corner of the house smells amazing.

collection

And there’s still more tatting knocking about that needs to be ‘dealt with’… But as it goes, there are worse things to worry about.

Zipping about again

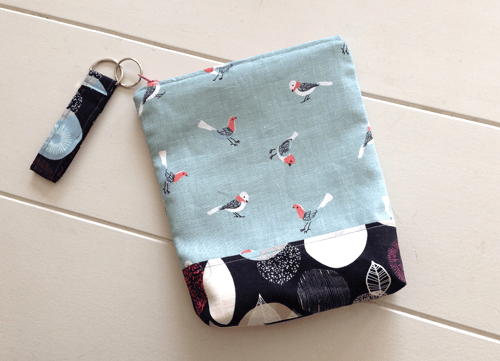
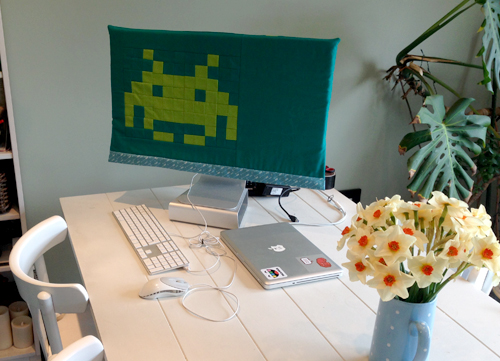
I bought this bird fabric a while ago on Etsy, on a bit of a whim. Today I decided I was going to make a zip pouch, and the plan was absolutely to use up the green fabrics I had left over from the spaceinvaders monitor cover the other week.

pouch_1

Then I opened the drawer to get out the cotton twill I bought ages ago for interlining, and saw the bird fabric and changed my mind. Its really lovely. Its almost like a very stiff linen, it’s not a regular cotton print. It actually creases really easily so it’s been ironed a million times. Its stiffness makes it great for something that might get thrown about a bit but its excellent creasing ability is a bit of a pain.

zipper_1

I had this pink zipper knocking around, which is actually not a bad match for the details on the birds. That said, it can look a bit too pink in a certain light. But hey, it’s just a zip, and I kinda like it being so bright – it feels like a feature.


zipper_2

Last time I made a pouch I used the hand-cranked Singer sewing machine, because I thought it had a zipper foot. It didn’t. This time I used the John Lewis Mini (its a bit like this) and it is also without a zipper foot. Actually I think that Elizabeth’s Hartman’s Zipper Pouch Pattern is so good that if you follow her instructions you can live without one. I’m sure it’s not perfect but it seems to work for me.

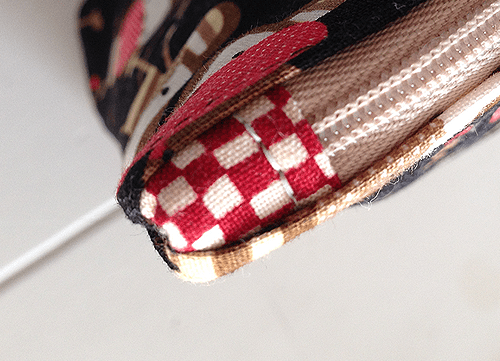
Its a great pattern, and I like the nice neat ends it gives the zipper. (Although you can see the stitching is a wee bit wonky there!) I must admit – I didn’t do a great job on the zipper pull. I found topstitching it really tricky – its not at all straight, but I’m trying to ignore that. I didn’t make a pull last time.

both

Here’s the first and second side by side. The monkey pouch is full of ribbons! It puts a smile on my face for the fabric AND the contents 🙂 Not sure yet what I’ll keep in the bird pouch. Looking at it now, I kinda think it looks better in real life… you’ll have to trust me on that. I’m not sure why I like zipper pouches so much, but there’s something really nice about them. There’s a woman on Etsy who screen prints fabrics which I really like, and I’ve almost bought a pouch from her a million times. I stopped myself because I don’t really need more, and the shipping is a bit expensive from Canada. If you live a bit nearer though, I think her work is lovely.

neat

Sorry – this is a totally gratuitous shot, and it’s not even from today. Look at it! Its so neat! I doubt I’ll ever match that on anything ever again.

Anyway…

tatting


Still experimenting with tatting patterns, but that’s for another post.

dodge

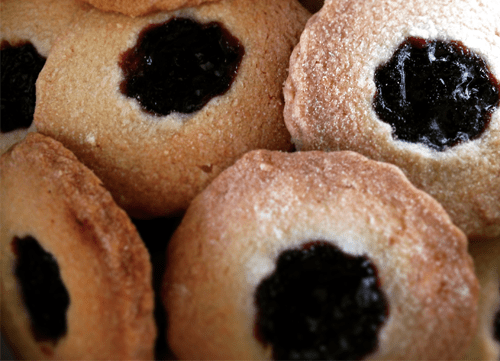
Annnnnd, I made some jammy dodgers in a fit of trying to seem productive on a day when my leg was driving me a little nuts. Hope you’ve had a good weekend wherever you may be.


Quilt invaders

colour_1

Its been another quiet weekend here as my other half left last Thursday to work in Barcelona for a few days. I mentioned previously that I’ve been working from home for a few weeks – I’m actually working in the kitchen, hooking up my laptop to a monitor which seems to’ve decided to move in. I’m not sure how we got from a nice empty (usable) kitchen table to one half full of tech, but it’s been handy for me, so I probably shouldn’t complain.

pixels

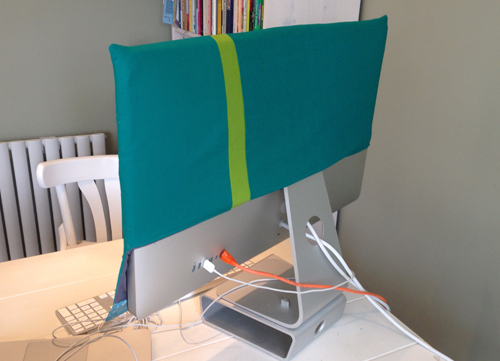
Its a nice new monitor, and my boyfriend has been bugging me to make a cover for it, to stop it getting dusty on the rare occasions we’re not using it. I’ve got an awful habit of making things we really don’t need, and nothing we actually *do,* so I felt obliged on this occasion to come up with the goods.

On Thursday I decided I knew what the weekend project would be, and hurriedly placed an order with M is for Make.

The fabric arrived on Friday, which was spectacular service and just what I’d hoped for. Its hard choosing colours from snapshots online, but I went with Kona Cotton: Lime, Emerald and Coal. The colours are really intense. I was super happy when I opened the envelope—and wondered why I’d not considered making a plain quilt before. I think I might try it. Anyway…

Can you tell what it is yet

Can you tell what it is yet?

diagram

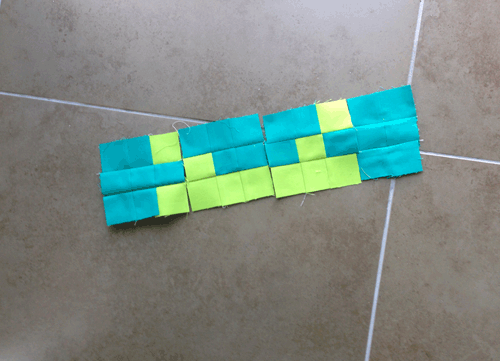
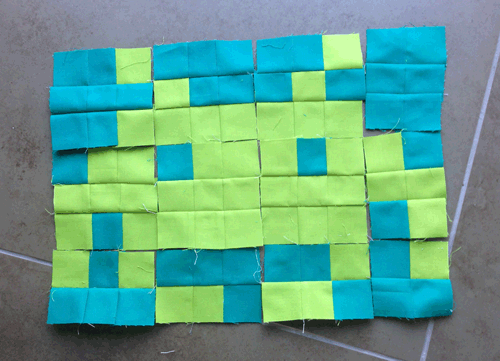
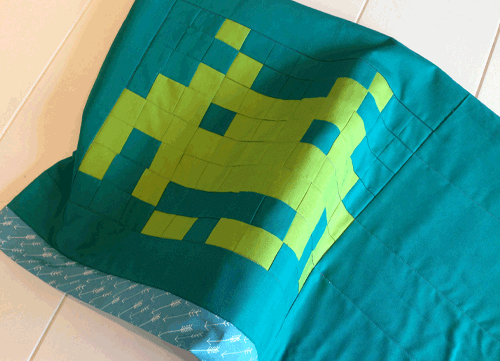
I chopped the fabric up into 2″ squares, and used them as pixels. I even made a proper effort and plotted out the pattern into six different nine patches, plus extras. (Although not very neatly, as you can see). In the unlikely even you want to do something like this yourself and the pattern would help, leave a note in the comments and I’ll email it over (I’ll tidy it up first).

invader

Having plotted it out, piecing it was really fast. It’s easy to chain the ‘pixels’ together as you go, so for example, pixel 1 and 2 of the first square, followed by 1 and 2 of the second, third, fourth, by then you can add the 3rd pixel to square one, etc. Before you know it, you have the first line done.

bigger invaderI decided it would be more interesting if the invader wasn’t central, so pieced him over to one side. I’d love to share my measurements but I didn’t really make any…

strip

Which is why after I’d pieced everything together it turned out too short, so I had to add an extra strip on the bottom. (I’d bought this fabric at the same time, to co-ordinate but until that point had no need of it.)

back

I’d love to share my method for putting this together, but it was awful. Frankly I have no idea what I’m doing. The back (seen above) needs to be shorter than the front to allow for cables etc, which completely flummoxed me, I’ve got no idea why. Looking back, I should just’ve stuck to a method like a bigger version of the needle case with a pocket but I went down some insane route that I can’t even begin to describe. Anyway. Don’t do that.

inv5

Here’s a pretty terrible shot of it in situ, with what looks like avery unhealthy cheeseplant in the background. Don’t worry, it is actually healthier than it looks…

Overall, it’s functional, I love the colours, and I’m very pleased with the invader. I’m a wee bit frustrated that I did such an awful job of putting the rest of it together, but you live and learn. It’s also put me in more of a mind to make the pixel skull quilt that I promised to my boyfriend an age ago…final


Crochet, tatting, knitting, patchwork, secrets and lies

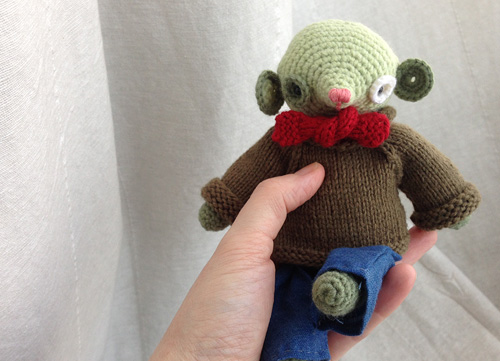
Little man

You know some weeks, nothing seems to work? I got so frustrated finishing this chap on Friday that I threw him in the bin. My boyfriend spotted him in there yesterday and took him out – then gave me a telling off for being mean.

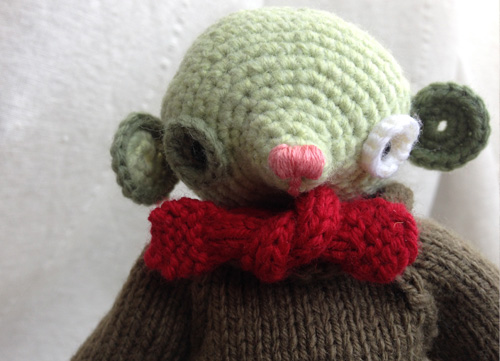
He’s supposed to be a little mismatched, his ears and eyes are different, but really, his jumper was actually supposed to fit. I had to unpick half of the jumper when I realised I’d mis-counted due to a phone call. Then I realised that even after re-making, the dimensions were never going to work. The nice cuffs were going to be hidden as the sleeves need rolling up, and don’t even talk about the neck… (I’m so pleased I guessed it all correctly for the giraffe – looking back it’s a miracle!)

lil_chap2

In the end I stitched him into the jumper at the back, so it kind of fits, but it’s not ideal. I also made him some trousers – it’s not that easy making trousers, is it?! I just guessed the shape; imagine two pieces of fabric shaped a bit like an upside-down ‘V’. I ended up cutting them in half and re-sewing down the centre to get the right shape – but I think I might understand a little more about trouser construction than I did before!

lil_chap3

Actually after all that I really like him. In real life he looks like quite a gentle, bookish soul. It’s really the jumper that does it. Now I can actually knit I think every crocheted toy needs a jumper. Due to the slightly delicate clothing construction he’s definitely not for playing with, so I think he’ll live with me. I have a feeling he’ll be happy on a bookshelf though – I just need to be nice and apologise for throwing him away. (!)

Patchwork

Before I started fixing him yesterday, I got the sewing machine out and had a bit of a play. I’d already decided what I wanted to make, but I fancied playing with a few scraps first. These were all small pieces from my scrap bag, but I think they go nicely together. Not sure what I’ll do with it yet.

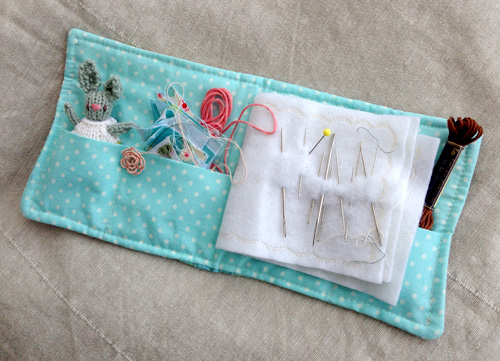
needlecase

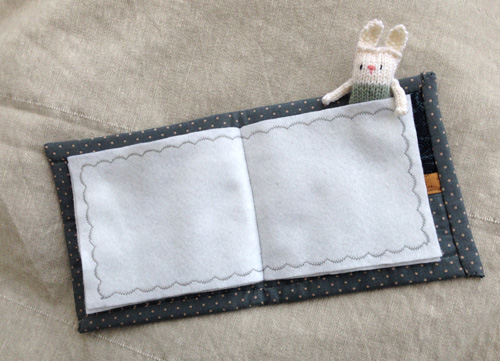
This is not the most inspiring photo, but I decided to make a needlecase, loosely based on this tutorial. The tatting has been knocking around for ages… Eeek, since 2013 in fact! I thought it might be nice making something a bit less girly for a change.

inside

This is what it’s like inside – a little pocket front and back, perfect for the essentials (like a rabbit). Don’t look too closely at the binding. Ahem.

inside2

Just like the previous one, this is all made of scraps – which includes the dreadful, cheap, synthetic felt. So just like the previous one I stitched around the edge of the pages, but this time with darker thread on one side. (Yes, that rabbit is hiding a mismatched corner… thanks for asking).

prev

I love how different the new case feels when compared to the old one. And talking of the old one… I use it all the time.

You know what I’ve noticed? Everyone who makes a needle case and then photographs it does what I did up there ^. They show a perfect selection of pins or needles, perfectly aligned. Who keeps a needle case like that?! No one, surely? Certainly no one that ever uses their needles.

reality


This is what the old needlecase looks like now. Its all bent out of shape and a mess.

But I love it.


Bags of joy (or craft as therapy)

bag_1

It’s been a weird month or so. My partner has been travelling a lot and for a boring health reasons (herniated disc) I’ve been stuck at home. Like many people who work in London and live in a town outside I don’t really know anyone locally. The last few weekends have stretched out endlessly – but in a bad way. When you’re feeling super-cheerful, a free weekend feels like a brilliant opportunity. When you’re a bit fed up, it feels like it will never end. Social media doesn’t always help – perfectly posed photos of friends having amazing times, going places and doing things, and there you are home alone, climbing the walls (or you *would* climb a wall, if you were able to stand up).

There’s a lot been written and researched into the therapeutic effects of knitting and/or making things; here’s one article. Google and you’ll find loads more. I have to say I agree completely. I find that tatting and knitting both require counting, which calms a busy brain, and that sewing is good because often the projects are started and finished in a day and you really feel like you’ve achieved something.

There is no physical position I can get in that is pain free at the moment (can’t sit on the sofa, can’t lie down) – BUT on the upside, the closest I can get is a hard chair at the kitchen table, as long as it’s not for too long.

I decided this was the perfect weekend to make the most of a few things aligning: free time, no interruptions, a free kitchen table. What did I plan on making? Another zip top bag. What did I make? A drawstring bag!

bag_2

I’m really pleased with it, even if I do say so myself. I bought this the Elementary Mini Charm Pack from Moda just before Christmas. I’d sort of said that I would make my partner a quilt, but the one I have planned needs some black fabric. I bought the charm pack as a tester to see what would and wouldn’t work. I must admit, it’s a really nice pack. You get 42 squares in total – which when they’re all laid out, is quite a lot.

The zipped pouch I was going to make would only take 4 of these squares and when I put them together, it seemed like a shame. It felt like it would be nicer to put a few more together and make something bigger.

bag_3

I made this drawstring bag in 2013, and I use it all the time. It’s quite big, and of all the things I’ve made, it’s the thing I enjoy using the most. (Although I think that could be because most of the things I make aren’t that useful!) It’s tatted and embroidered – which despite being a bit flowery for my tastes I really like – and thinking about it, I wonder why I’ve never repeated? Anyway. I decided to make another bag roughly the same size.

bag_4

(Sorry for rubbish iPhone photos – the blank patchwork square actually has a pattern on it!). I didn’t measure anything – I just started with the charm squares and went from there. I ALMOST had a wobble when the charm squares were put together and the grey border added… would make a really nice quilt, but I decided I wanted to finish something there and then and actually, I have a use for the bag already. The white fabric with tiny blue stars was a speculative purchase ages ago, the grey fabric was in my stash and I managed to cobble just about enough calico together to line the inside. The ribbon handles I found in the back of a drawer – I was really pleased as they’re not a bad colour. I think they’re the handles from a posh carrier bag. (Always save those ribbons and cords, they’re usually just the right size for *something*).

bag_5

In terms of construction, I used this tutorial again, I quilted the main section after the patchwork was complete and before I started putting the panels together. By which I mean I stitched through the front straight on to the batting, with nothing behind it. The top grey section has iron-on interfacing to make it stronger, as it’s the bit that gets the most stress. Inside it’s just basic calico, which is heavy duty enough, and cheap, of course. I actually didn’t do a *terrible* job of that top stitching on the outside – but yes, I was too lazy to hunt for a more discreet thread colour.

And thus, mission completed. Just the right project – took long enough, but not too long. Required the right amount of sitting, but enough to keep that spine moving, as you need to get up and iron things, or chop things up. It also needs a bit of thought, but not enough to make you worry about it.

If you need  a project to cheer yourself up, and you like sewing, I would recommend it. (If you like knitting, I would recommend a hedgehog.) I’m hoping though, that if you are sewing things, you’re happy both before *and* after you start!

Here’s to it, us and making things.
 

Patchwork and tatting to beat the rain

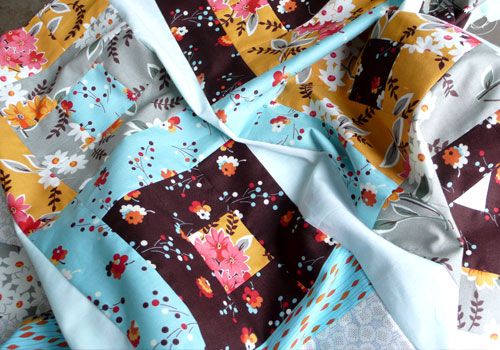
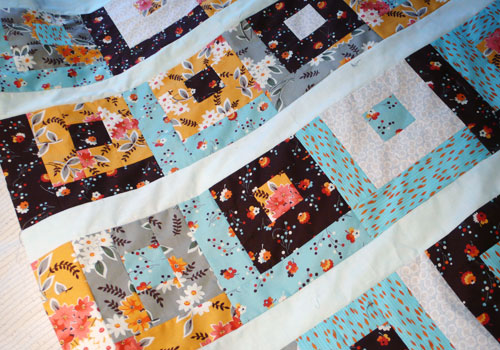
quilt_3Hello! It’s a wet and windy weekend in the UK, and due to my other half being away for work I’ve had time to get on and make an eye-wateringly cheerful quilt top, in record time. Not only that, but it’s much less wonky (so far) than my previous quilting efforts. I bought this fabric at the Knit and Stitch show in Ally Pally (London). It was a pack of quite tightly-rolled fat quarters – so you couldn’t really see what you were getting – which worked out at £12 a pack or £20 for two. As a lady next to me was contemplating a pack at the same time, I said, “let’s buy them together and we both save £2”, which is what we did.

quilt_2

Sorry – terrible lighting, don’t really have anywhere I can photograph a quilt.

I had to improvise with the pattern a bit; originally I wanted it all to be colour and pattern with no plain solids in there, but I used up all the fabric and it was a bit small so I added the sashing in. The sashing is actually a pale turquoise left over from quilt two, which is quite handy.

quilt_4

At the edge of one of the pieces it said “Flea Market Fancy”, and I was just in the process of discovering that the collection was based on retro designs, when my boyfriend arrived home, looked at it and said ‘Nice… have we gone back to the seventies?” It *is* a bit seventies, but I still love how bright and cheerful it is. To be honest, they’re not the usual kind of fabrics I’d choose.

Which leads me to the William Morris quilt, which I started here. Believe it or not, I’ve actually finished the top of that too, just not had time to take the pictures. Next I need an expensive trip to the quilting shop, to buy batting and backing fabric.

quilt_6

Actually, looking at the light on these photos, it doesn’t do it any favours. I promise you it’s nicer in real life! This was a pile at the start of Saturday. It was a lot bigger by the end. For once, as I was making squares, I measured them up and trimmed them down properly.

tatting

On a more restrained note, I also got a little bit of time to tat the other week. This is a new pattern that I’ve been working on. Not there yet actually, but almost. And on that note, better run. More things to do.

Hope you had a good weekend too.